Amazon Web Services (AWS) Installation
FileCloud Public AMI (Amazon Machine Image) is currently available in Amazon AWS Marketplace.
![]() See FileCloud AMI here on AWS Marketplace.
See FileCloud AMI here on AWS Marketplace.
![]() In the following section, to display more information, click on a topic.
In the following section, to display more information, click on a topic.
The FileCloud AMI image is built on top of Ubuntu.
- FileCloud stores the meta data and file share information in MongoDB database which is already pre-configured in the FileCloud AMI.
- The actual files can be stored in EBS or S3.
- For scalability and redundancy, we recommend you use Amazon S3 for production.
- We also recommend to take periodic snapshots of your running instance for disaster recovery.
Best Practices for an organization of up to 100 users:
- Select a t2.medium, m3.medium, or m3.large instance
- Use Amazon EBS for FileCloud stack (FileCloud application, Apache Webserver, MongoDB Database)
- Use Amazon S3 for cloud storage to provide a scalable, redundant infrastructure to satisfy any business requirement
What if I'm not using Ubuntu?
Apart from FileCloud AMI on Ubuntu, we have also pre-built AMIs (BYOL - Bring Your Own License) available on supported versions of Windows Server. Please see the AWS marketplace links below,
![]() FileCloud Enterprise File Sharing and Sync (Windows Server 2016)
FileCloud Enterprise File Sharing and Sync (Windows Server 2016)
 FileCloud for Windows Server 2012
We have also the following paid AMI's available on AWS Marketplace,
FileCloud Enterprise File Sharing and Sync (20 Users)
FileCloud Enterprise File Sharing and Sync - Windows 2012 R2 -(20 Users)
 Launching the FileCloud AMI
 An Amazon Machine Image (AMI) is a master image for the creation of virtual servers, known as Elastic Cloud (EC2 instances) in the Amazon Web Services (AWS) environment.
Machine images are like templates that are configured with:
- A root volume. This is an operating system and other software.
- Permissions. These settings constrain AMIs for instance launches to the appropriate AWS accounts.
- A block device mapping. This ensures that the correct volumes are attached to the launched instance.
These elements determine the user’s operating environment.
![]() In the following section, to display more information, click on a step.
In the following section, to display more information, click on a step.
To launch the FileCloud AMI:
An AWS Account
An AWS account allows you to:
- Open the Amazon EC2 console
- Choose a launch instance
- Launch your instance
![]() If you've already signed up for Amazon Web Services (AWS), you can start using Amazon EC2 immediately.
If you've already signed up for Amazon Web Services (AWS), you can start using Amazon EC2 immediately.
![]() If you haven't signed up for AWS yet, use the following link to get set up to use Amazon EC2.
If you haven't signed up for AWS yet, use the following link to get set up to use Amazon EC2.
![]() You can read more about Amazon Elastic Compute Cloud on Amazon's site.
You can read more about Amazon Elastic Compute Cloud on Amazon's site.
You can begin the process of launching a Linux instance by using the AWS Management Console.
To launch an instance:
- Open the Amazon EC2 console at https://console.aws.amazon.com/ec2/.
- From the console dashboard, choose Launch Instance.
- The Choose an Amazon Machine Image (AMI) page displays a list of basic configurations, called Amazon Machine Images (AMIs), that serve as templates for your instance.
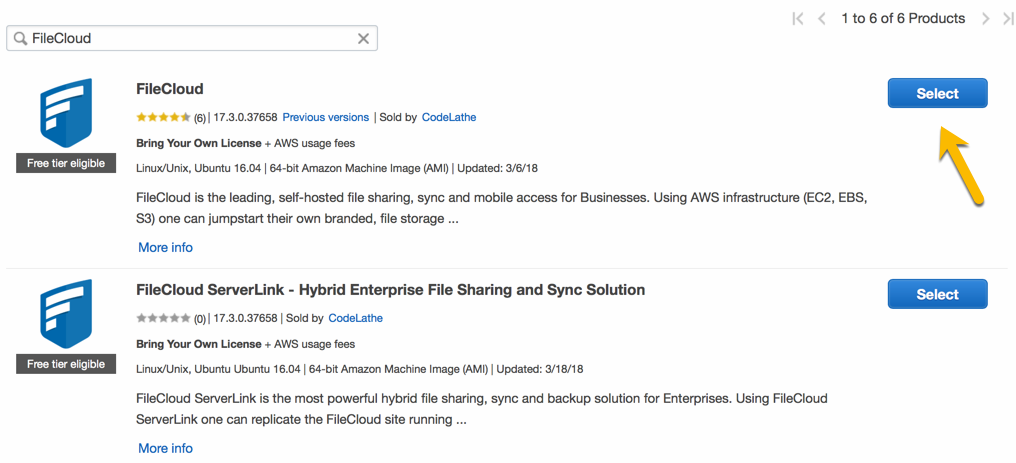
- In the Search bar, type in FileCloud.
- Next to the latest version, click Select.
Figure 1. An example of FileCloud listings in AWS Marketplace. (This image does not necessarily show the latest version.)
When you launch an instance, the instance type that you specify determines the hardware of the host computer used for your instance.
Each instance type offers different capabilities, such as:
- compute
- memory
- storage capabilities
Instance types are grouped in instance families based on these capabilities.
![]() Read more about Amazon's Instance Types
Read more about Amazon's Instance Types
Table 1. General Purpose Instance Types
| Instance Family | Current Generation Instance Types |
|---|---|
| General Purpose | m5.large | m5.xlarge | m5.2xlarge | m5.4xlarge | m5.12xlarge | m5.24xlarge | m5d.large | m5d.xlarge | m5d.2xlarge | m5d.4xlarge | m5d.12xlarge | m5d.24xlarge |
![]() Read Amazon's complete listing of Available Instance Types
Read Amazon's complete listing of Available Instance Types
![]() CodeLathe recommends that you should select an instance type based on:
CodeLathe recommends that you should select an instance type based on:
- Minimum requirement: m5.large
- For best performance: Select a type in the m series. For example: m5.xlarge
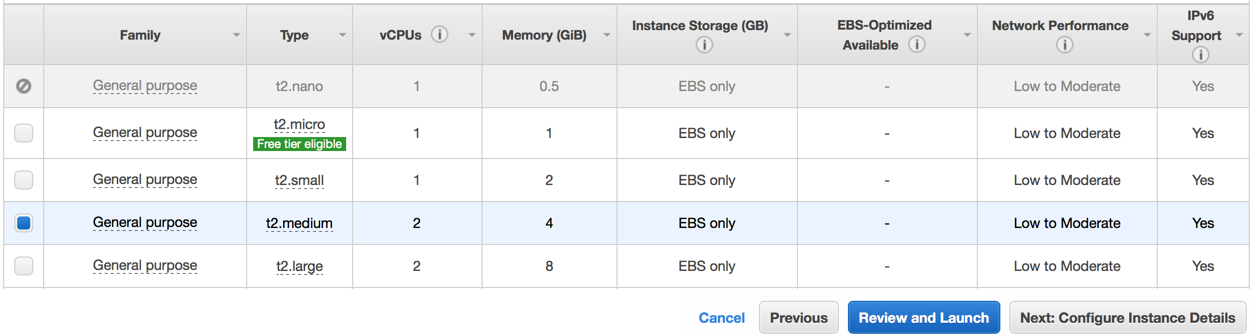
To choose the Amazon EC2 Instance type:
- On the Choose an Instance Type page, you can select the hardware configuration of your instance.
This step can change depending on the Instance Type you chose:
- T2 instances, such as t2.micro, must be launched into a VPC.
- If your AWS account supports EC2-Classic and you do not have a VPC in the selected region, the launch wizard creates a VPC for you and you can continue to the next step.
- Otherwise, the Review and Launch button is disabled and you must choose Next: Configure Instance Details and follow the directions to select a subnet.
Figure 2. Options for the next step after selecting an instance type.
To configure instance details:
- If you selected an Instance Type of t2.medium or t3.medium, then you must enable T2/T3 unlimited. See Figure 3.
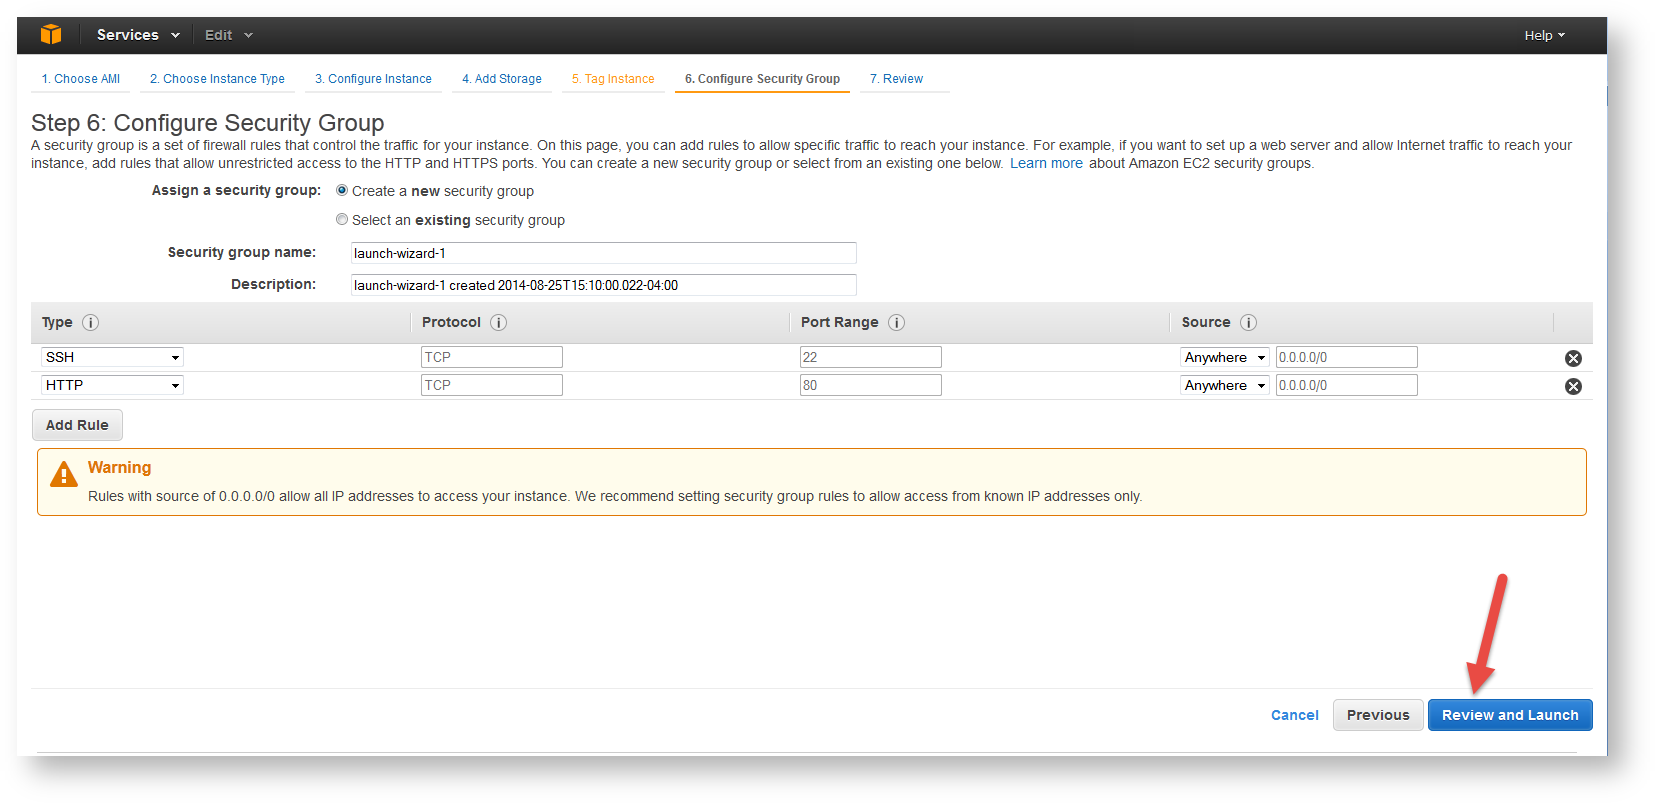
- When you get to the Configure Security Group step, open up the port 80/443 for web access. See Figure 4.
- You might need to open other ports such as 443 (HTTPS), depending on your business requirements.
Figure 3. Configure Instance Details
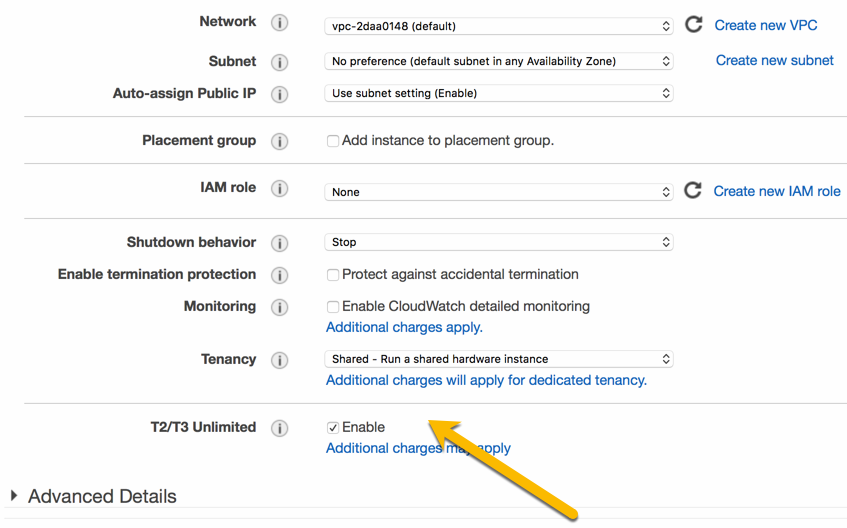
Figure 4. Configure Security Groups
![]() You can read more about Amazon EC2 Security Groups.
You can read more about Amazon EC2 Security Groups.
To complete the Final Review and Launch, see the next step: Step 5: Launch the Instance
To launch an instance:
- When you are ready, click Review and Launch
- Next to your instance, select the acknowledgement check box, and then choose Launch Instance.
- A confirmation page lets you know that your instance is launching.
- Choose View Instances to close the confirmation page and return to the console.
- On the Instances screen, you can view the status of the launch. It takes a short time for an instance to launch.
- When you launch an instance, its initial state is pending. After the instance starts, its state changes to running and it receives a public DNS name.
- If the Public DNS (IPv4) column is hidden, choose Show/Hide Columns (the gear-shaped icon) in the top right corner of the page and then select Public DNS (IPv4).
- It can take a few minutes for the instance to be ready so that you can connect to it.
- Check that your instance has passed its status checks in the Status Checks column.
- Note the Public DNS name to access your FileCloud site.
Figure 5. FileCloud Status in Your AWS dashboard.

To connect to your instance:
- Open a Web browser.
- to access the FileCloud admin portal, type in the following URL:
| http://<public_dns_name>/ui/admin/index.html |
|---|
3. To login to the Admin Portal, use the following information:
| Default Admin | admin |
|---|---|
| Default Password | Your amazon instance ID |
After logging in for the first time, you must change the admin password.
4. After logging in, you will see an Admin Attention window. Use this to install the FileCloud License.
![]() To receive a license you must register at the FileCloud license management portal.
To receive a license you must register at the FileCloud license management portal.
After logging in to the Admin Portal, you will see an Admin Attention window. You will also see tags on the right side of the dashboard telling you about what needs to be done after installation.
Complete the following items after you are able to launch and connect to your instance:
| Item |
|---|---|
| Remove the Installation Folder | |
The default FileCloud instance uses CodeLathe SMTP servers and accounts to send emails. Change the SMTP servers and accounts to use your own servers for security purposes. | |
The admin email address is used in all the emails that sent out from the FileCloud System. Change the admin email to your organization email address. | |
To show all the installed packages in this instance:
| |
| The user name for the underlying Ubuntu OS is 'ubuntu'. Before launching the instance you will be required to create a key pair or you can use your existing key pair. | |
FileCloud recommends you use S3 for file storage instead of the EBS.
| |
| After you configure the FileCloud storage, follow the site setup instructions to setup the FileCloud site according to your requirements. | |
| Take Periodic snapshots of your running instance for Disaster recovery and as an additional backup for FileCloud database and app. |
The ability to install an Enterprise license with components (like Salesforce) is available in FileCloud Server version 18.2 and later.
- Your AMI image will automatically come with a standard or enterprise license.
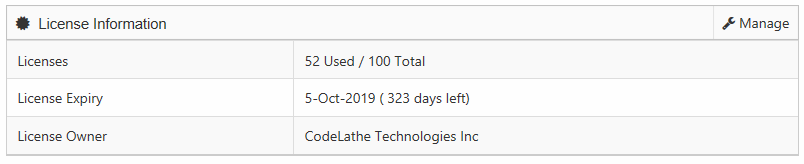
- When you log in to the Admin Portal, you can automatically see the License type (BASE/ENTERPRISE) and also the total number of licenses on the dashboard.
Need to seed data quickly into your new FileCloud installation?