FileCloud Add-In for Microsoft Outlook
FileCloud Outlook add-in brings the powerful features of filesharing to the Windows desktop and Outlook. The Outlook add-in enables the user to:-
- Share a file or folder that resides in FileCloud directly from Outlook.
- Upload a file to FileCloud and share directly from Outlook.
- Ability to share a FileCloud file as an email attachment or generate a link.
This seamless integration with MS Outlook will improve the efficiency and productivity of any Outlook user when sharing files or folders within the organization or with 3rd party vendors. Therefore, the Outlook add-in brings FileCloud to the email platform and integrates cloud access in the user’s workflow.
System Requirements
OS: Windows 7 and above
Outlook: 2007 and above
.NET Framework: 4.5 and above
Admin Privileges are required to complete the installation
Installation
- Download and install the FileCloud Outlook Add-In through this link: Outlook Add-In Download.
- Accept any security warnings and continue installation.
- Admin privileges are required to complete the installation.
- The add-in will be installed under program files and will be installed for all users in that system.
- Once installation is complete, please restart Outlook.
Once installed
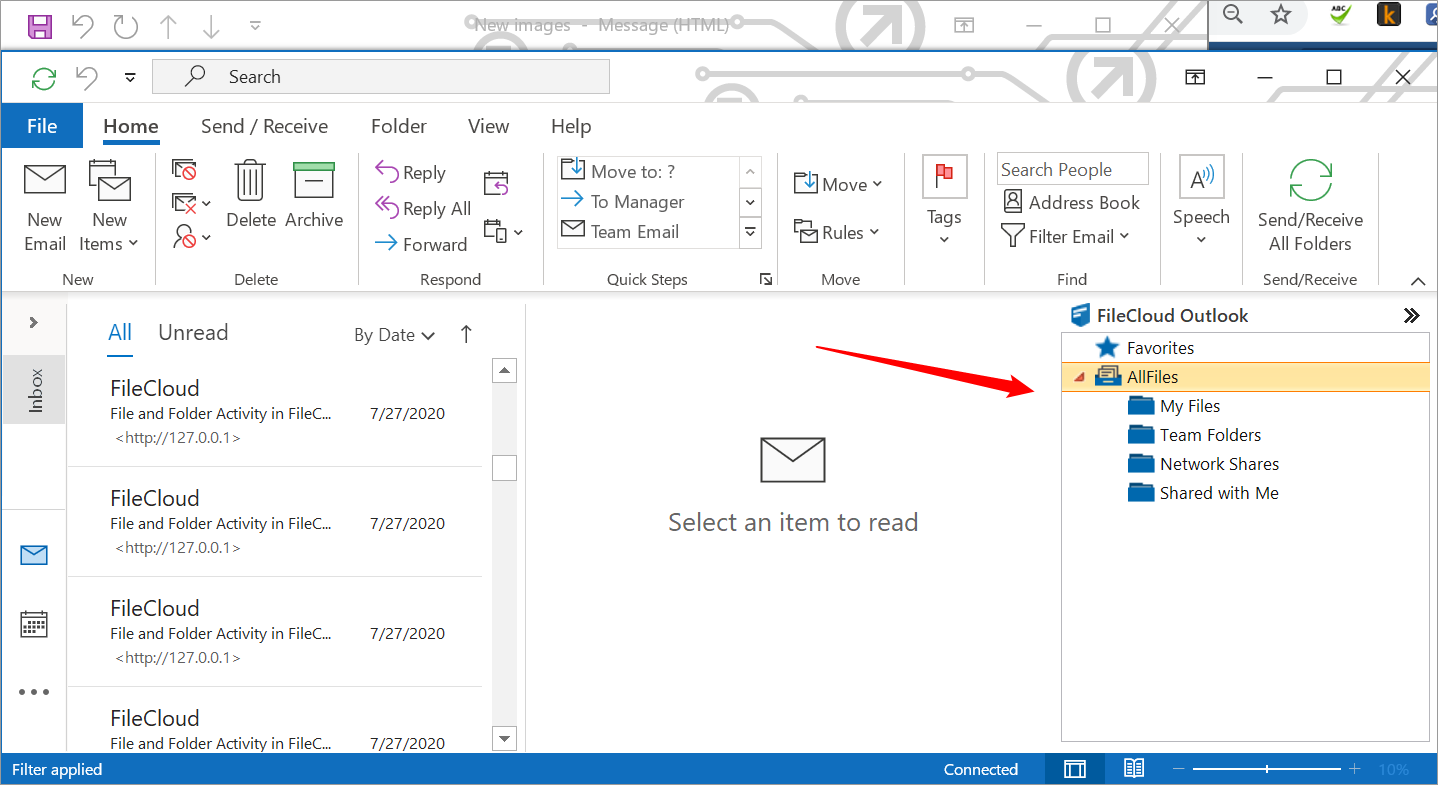
- In versions 20.2 and higher of FileCloud, a FileCloud explorer appears in the right panel of Outlook. The explorer enables you to work remotely with your FileCloud files and folders from Outlook.
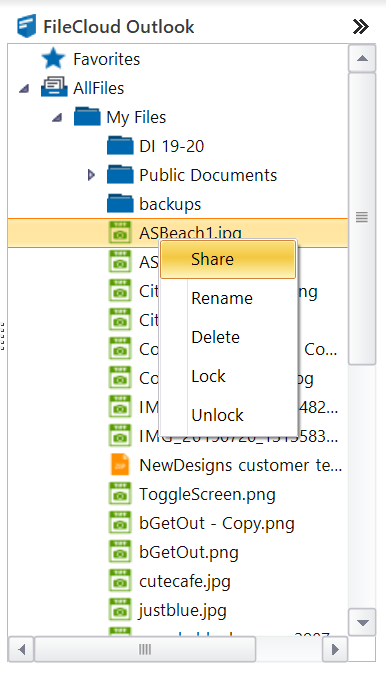
When you right-click on a file in the explorer, a menu with the actions Share, Rename, Delete, Lock and Unlock opens. You can also drag an attachment from a message, and drop it into My Files or a folder in My Files. When you perform any of these actions, you are directly acting on the files in FileCloud.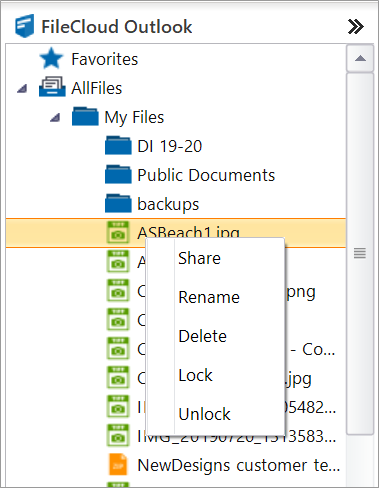
When you create new email
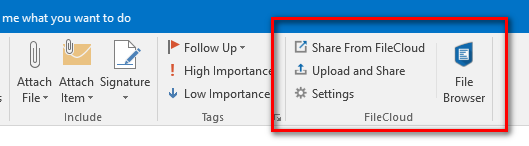
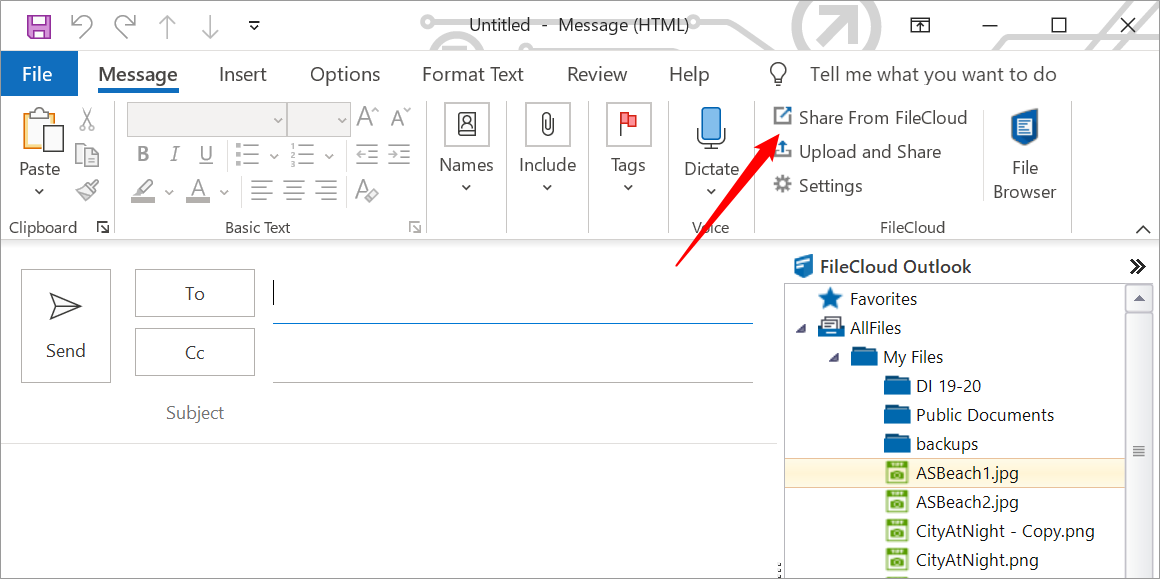
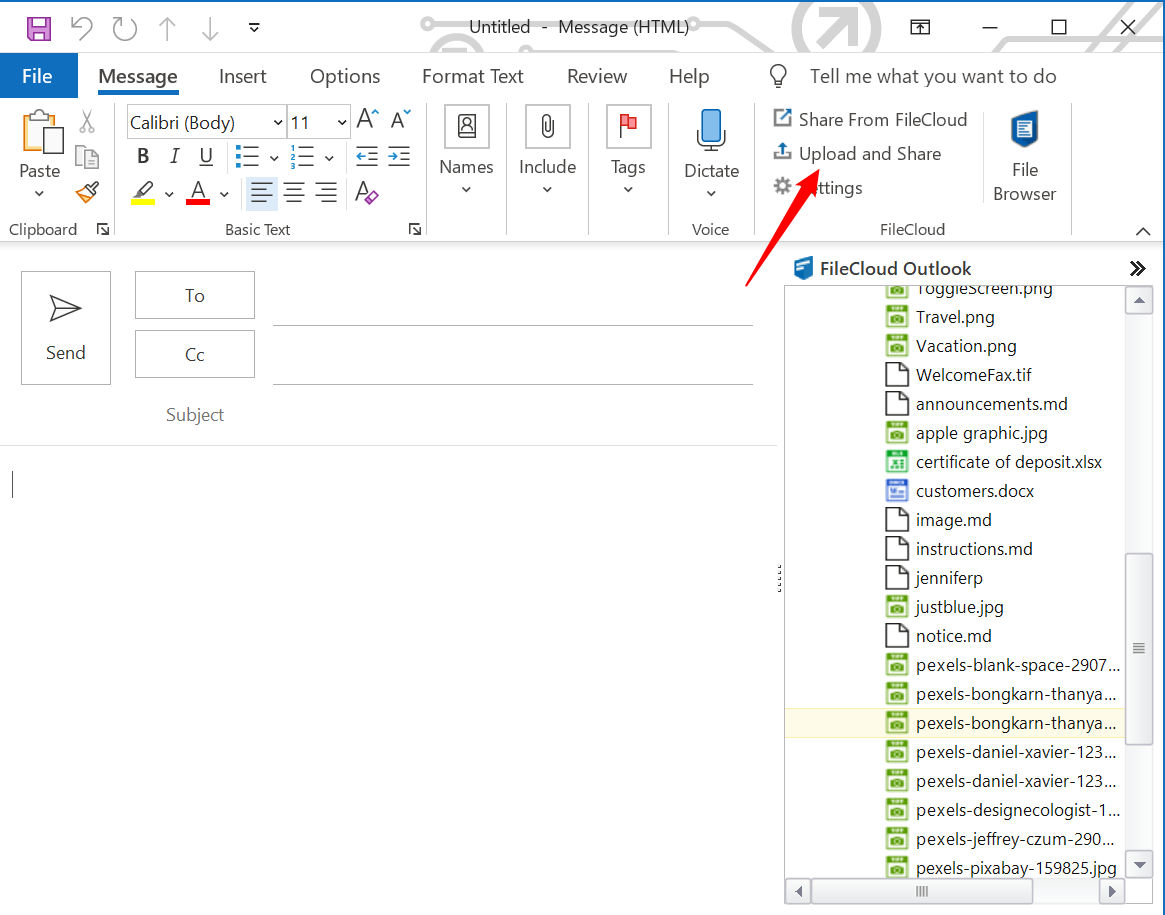
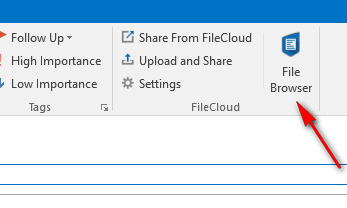
When you create a new message in Outlook, FileCloud appears in the Outlook ribbon in the message with the following buttons:-
- Share from FileCloud
- Upload and Share
- Settings
- File Browser
In Versions 20.2 and higher of FileCloud, the FileCloud explorer also appears when you open the new message box. This enables you to drag a file from FileCloud and drop it into a new message as an attachment.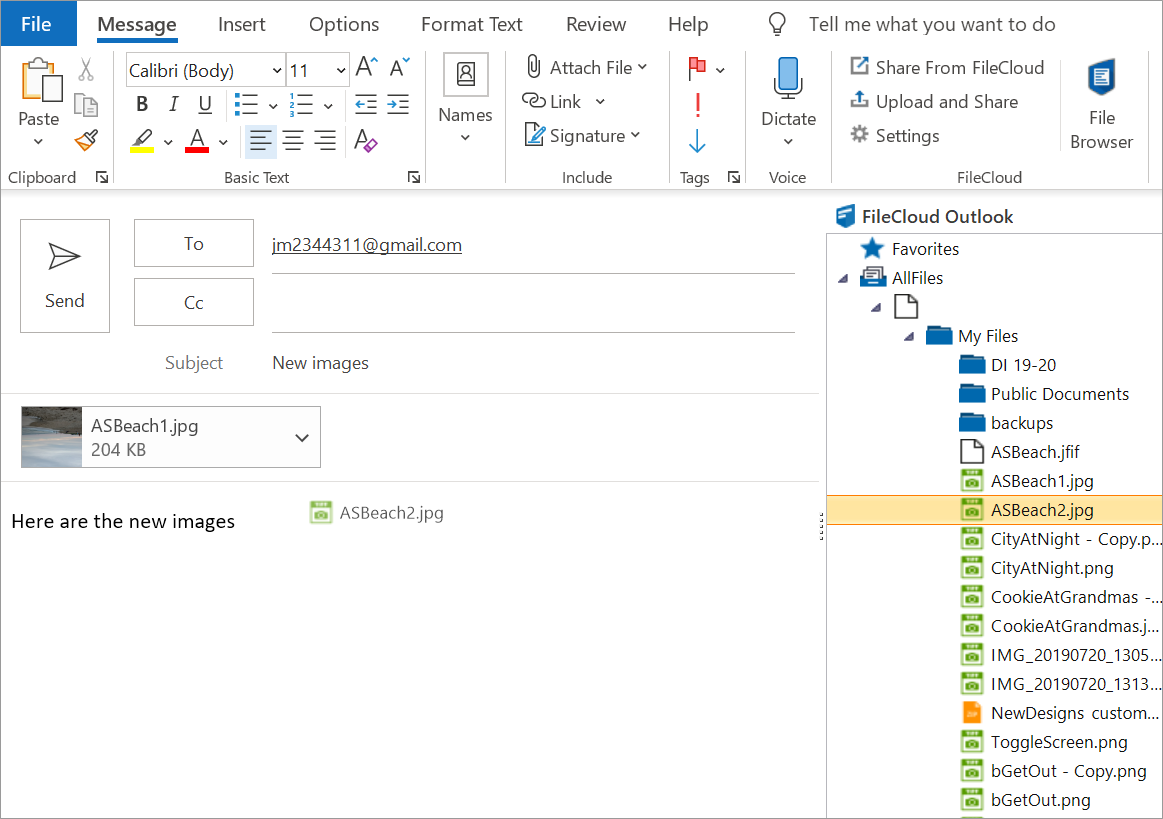
As in the FileCloud explorer in the main Outlook window, when you right-click on a file, a menu with the actions Share, Rename, Delete, Lock and Unlock options opens.
Settings
The settings link opens a dialog box that enables you to configure settings and helps you to troubleshoot.
| Settings | Description |
|---|---|
| Account Settings | Sign in to FileCloud by entering the FileCloud Server URL, username and password. |
| Upload Settings | Set the default upload folder for all files that are uploaded. NOTE: To enable/disable auto-upload of attachments, Outlook must be restarted after the setting is changed. |
| Share Settings | Set the following settings:-
|
| SSL Settings | Ignore SSL Errors and Connect to Only TLS 1.2 Server (applicable when your FileCloud server is supporting only TLS 1.2) |
| Proxy Settings | Enter settings for proxy server, if any. |
| Language Support | English, Dutch, and Arabic are supported. To make the language change effective, you must restart the Outlook add-in. |
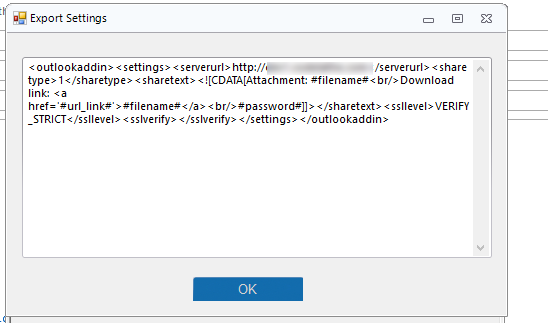
| Help | Display the FileCloud Version. Troubleshooting - Open the Log Folder where the add-in stores its activity logs Export Settings - Create a well formatted XML of settings. Ideally, admins can create the settings, export them as XML and use the XML file for Mass Deployment using Device Management.
For more detailed support on export settings, please see Centralized Device Management |
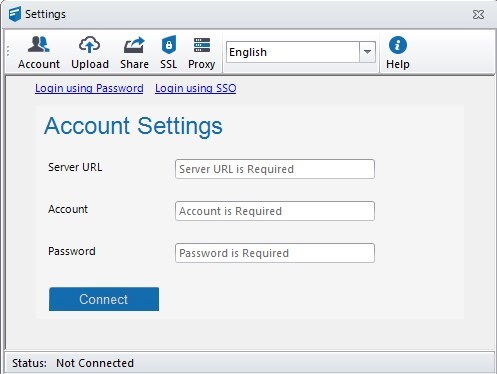
Account Settings
On this tab, enter the FileCloud server URL, account and password and click Connect to sign in to FileCloud.
To log in with SSO, click Login using SSO.
Enter your Server URL and click Connect. See Single sign-on (SSO) for help setting up SSO. 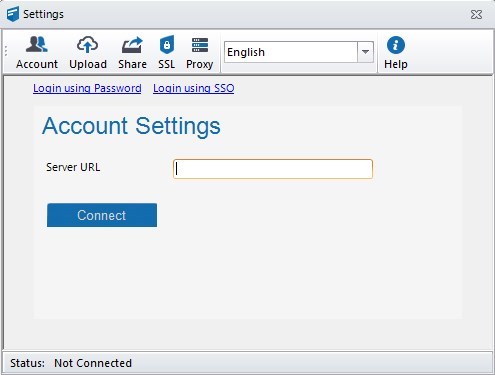
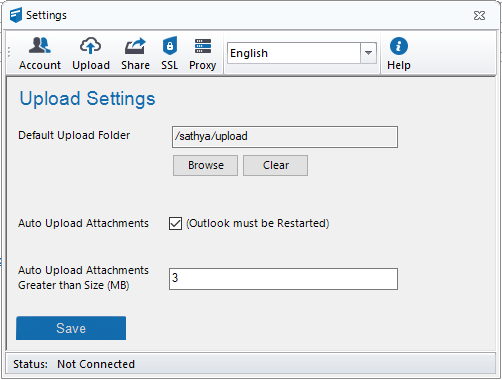
Upload Settings
You can set Default Upload Folder and allow auto-upload of file attachments that are greater than a certain size. Please note that auto-upload of attachments requires that you restart Outlook.
Default Upload Folder designates the FileCloud folder that uploads are saved in. If a default folder is not designated, you are prompted for an upload folder path when uploading a file.
You can set default values for Auto Upload Attachments and Auto Upload Attachments Greater than Size (MB) by going to Settings > Policy and in the Device Configuration tab for the policy, setting up xml parameters. See Device Configuration XML For Outlook Add-in for help.
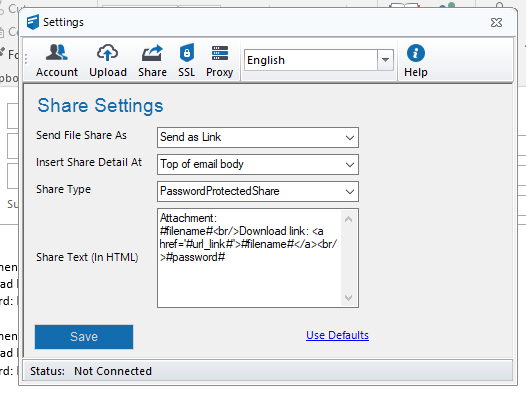
Share Settings
Share settings are used when a share is created and sent through Outlook.
| Setting | Description and options |
|---|---|
| Send File Share As |
|
| Insert Share Detail At | Allows you to set the default position of the share detail in the email body.
|
| Share Type | Set the default share type when shares are created.
|
| Share Text (In HTML) | Text added to the email body that defines the share link. HTML may be included to format this text. Default: Attachment: #filename#<br/>Download link: #url#<br/>#password# The following place holders are available.
|
Proxy Settings
Proxy settings must be set when your network uses a proxy server or you would like the FileCloud Outlook Plugin to use a proxy server. You must contact your network administrator to get the Proxy Server address, port, username and password.
Create a share in a new message
When you create a FileCloud share in Outlook, you can add the share link to your Outlook message either:
- by right-cicking on the file in the FileCloud explorer in the right-panel
- by clicking the Share from FileCloud link in the ribbon of the new email.
Both give you the same opton of adding the share as a link in the email.
When you create a share in a message, you have the option of adding it as a link or an attachment to the message. By default, it is added as a link. To add it as an attachment, click Settings in the ribbon above the message and change the setting in the Share window of the Settings box to Send as Attachment. See Share Settings, above.
To add a share in a new message:
- Open Outlook and click New Email.
A new email form opens. Create a share in one of the following ways:
From the FileCloud explorer in the message box From the Share from FileCloud link in the ribbon of the message box - In the FileCloud explorer in the right-panel of the email form, navigate to the file or folder that you want to share, and right-click it.
- In the menu, choose Share.
- In the ribbon above the form, click Share from FileCloud.
A Share from FileCloud dialog box that displays your FileCloud folders opens: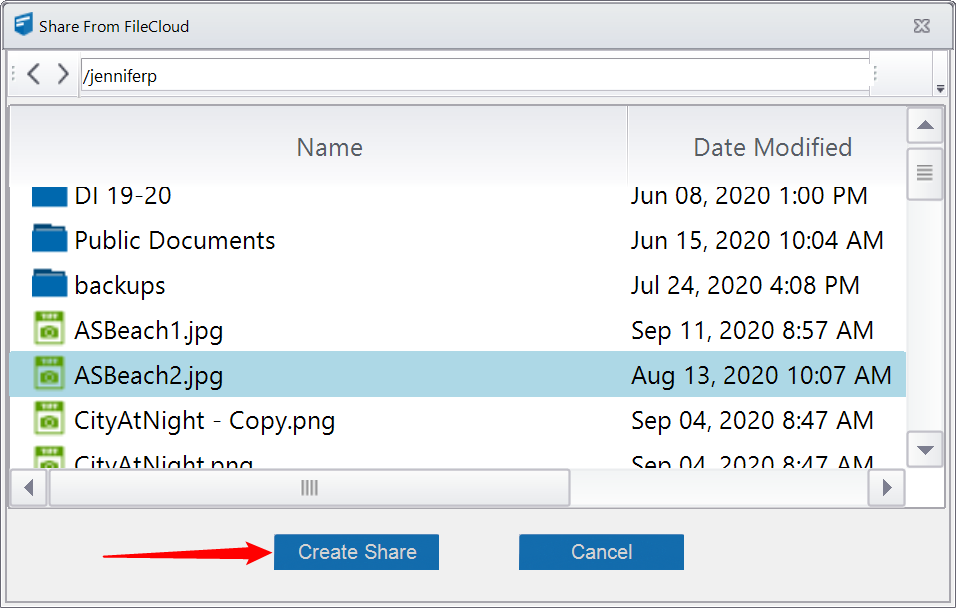
- Navigate to the file or folder that you want to share, select it, and click Create Share.
The share has been created. A Share Options dialog box opens:
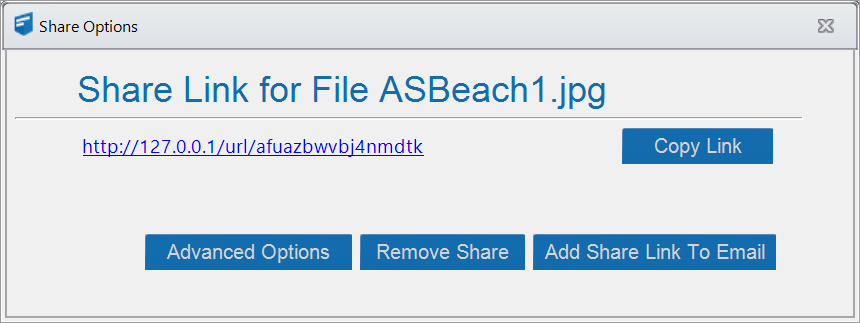
- Choose one of the following options (or x out of the Share Options dialog box to keep the share without including it in the email or adding advanced options):
- Copy Link - Copy the link so that you can paste it somewhere else.
- Advanced Options - When you first click the Advanced Options button, you see advanced options for public shares:

Next to Share Permissions, if you select Allow Specific Users/Groups, instead of a tab for Public Share Settings, a tab for Private Share Settings appears.
It enables you to share the file with specific users who already have accounts in your system and specific users who do not have accounts.
When you share files with specific users who do not have accounts in your system, clicking Add Share Link to Email only adds the share link to the email that you are composing; it does not send the new user a message indicating how to create a new account. You must check Send Email in the AddGuestEmail dialog box to send the new user a message instructing them to create an account on FileCloud.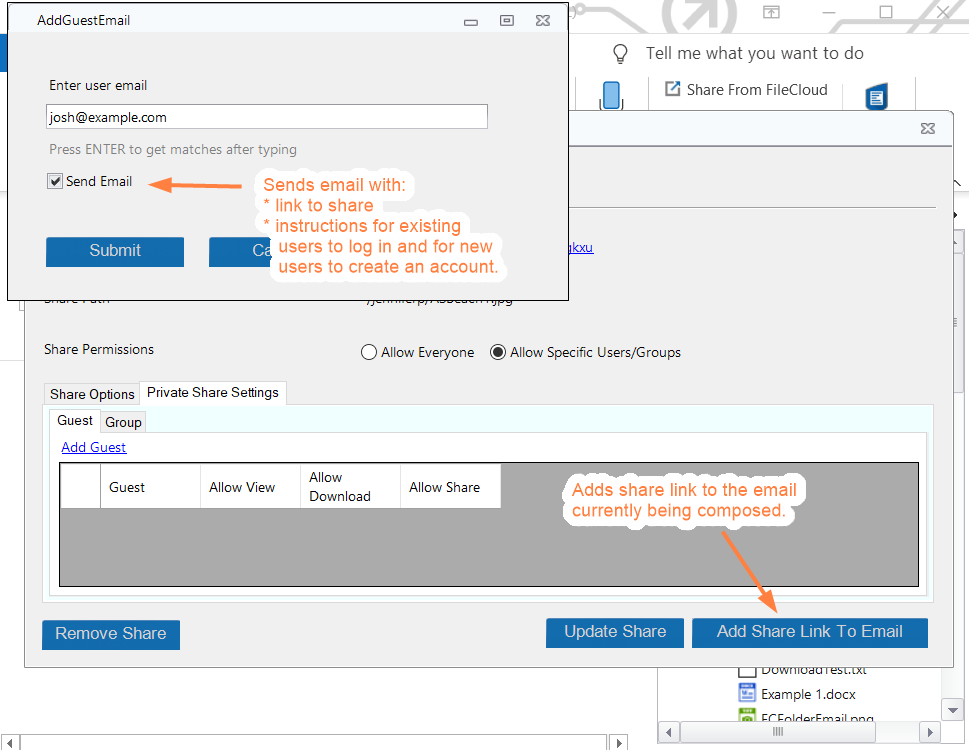
For additional help with share settings for public and private shares, see the topics in the section Sharing Files and Folders.
If you do not add advanced options, the share is available to anyone you send the link to. - Remove Share - Delete this share.
- Add Share Link to Email - Insert the link into the email that you are currently composing. The recipient can click it to access the share.

When the file is shared as an attachment, FileCloud downloads the file and adds an attachment to the email body as well as creating a public share.
Upload and Share
You can upload any file from your local drives to FileCloud and share the file. Once the file is uploaded to the FileCloud server, the file can either be shared as a link or as an attachment based on your settings.
To upload and share:
- Open Outlook and click New Email.
A new email form opens. - In the ribbon above the form, click Upload and Share.
Your file explorer opens. - Select the file that you want to share.
Your file explorer closes and a Select a Folder window opens.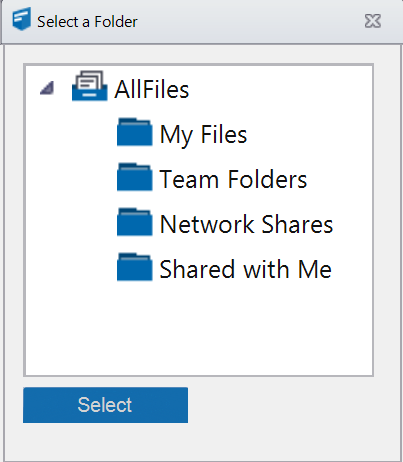
- Navigate to the folder that you want to upload the file into.
- Click Select.
The file is saved to the folder, shared publicly, and added as a link or an attachment in the email.
File Browser
Starting with FileCloud 17.0, the Outlook add-in app contains a remote file browser function to access, edit and view all files on the server. This is an alternative to the web browser to access FileCloud. To open the File Browser, click File Browser in the ribbon of an email form.
For more details support, refer to the File Browser for Outlook addin support page.
Troubleshooting
I am not able to see the FileCloud Outlook add-in inside Outlook.
At times, MS Outlook may disable an add-in if there is a 0.234 second delay in starting Outlook for any reason. In Outlook, go to File > Options > Add-Ins. Find the FileCloud Outlook Add-In from the disabled add-ins list and enable the add-in. You can set Outlook to always enable FileCloud Outlook add-in so that it does not get disabled.
Where is the log file stored?
The log files for the Outlook add-in are automatically stored under the %APPDATA%/filecloudoutlookaddin/data folder addin.log file. You can go to Settings > Help > Troubleshooting to go to the log folder. The log file does not store any secure data. In case, you run into problems, you may have to send us the log file to ensure proper troubleshooting.