Oracle Cloud Installation
FileCloud is available from the Oracle Cloud Marketplace for installation on the Oracle Cloud Infrastructure.
To install FileCloud on the Oracle Cloud Infrastructure (OCI):
Choose the FileCloud application in Oracle Cloud Marketplace.
- Log in to your Oracle account at:
https://www.oracle.com/cloud/sign-in.html
or, if you do not yet have an Oracle account, create one at:
https://signup.cloud.oracle.com/?sourceType=_ref_coc-asset-opcSignIn&language=en_US - Click the navigation icon in the upper-left corner:

- In the drop-down menu, enter Marketplace in the search bar and choose All Applications.
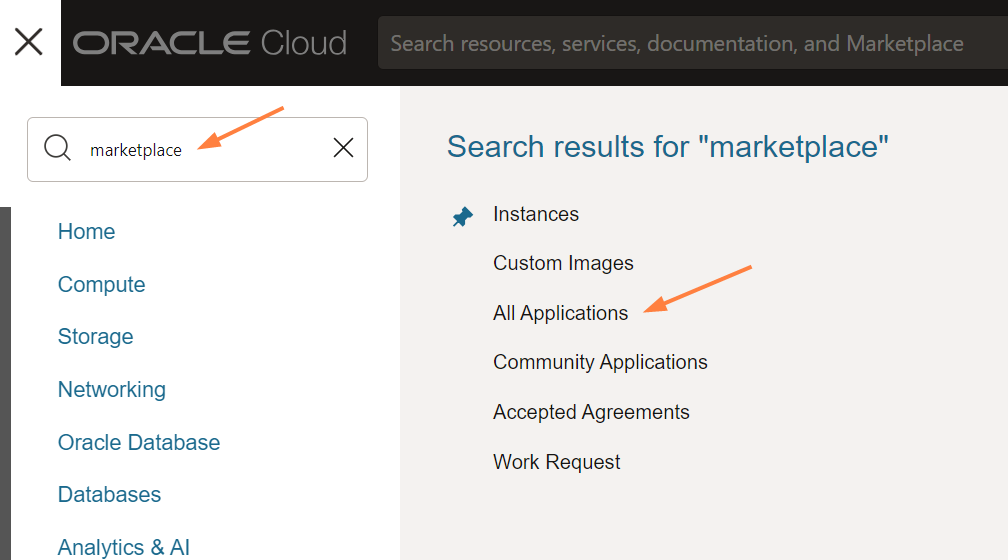
Oracle Cloud Marketplace opens to a view that shows all applications. - In the search bar, enter FileCloud.
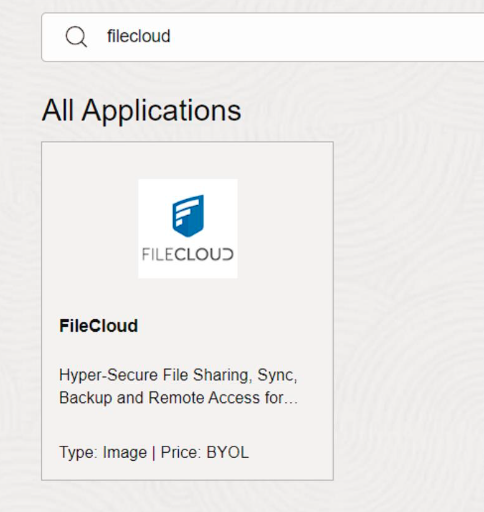
- Click the FileCloud app box.
The box opens up a new window as seen in the below screenshot. - In Version, choose a version. The latest version is labelled default.
- In Compartment, choose filecloud (root).
- Check the box to accept the Oracle terms of use and the Partner terms and conditions.
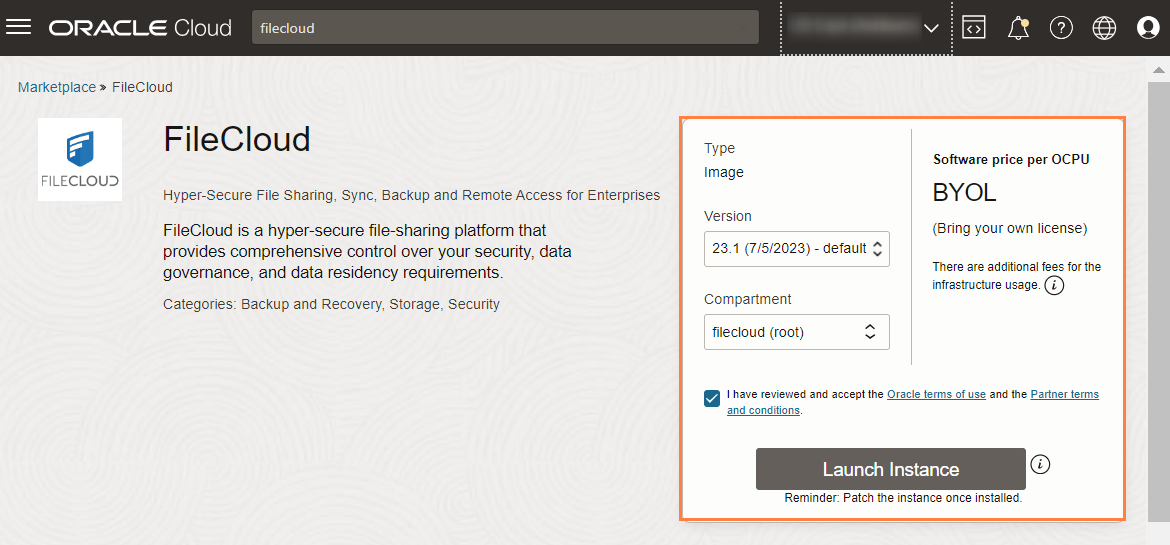
- Click Launch Instance.
The page Create compute instance opens.
Configure the details of the instance
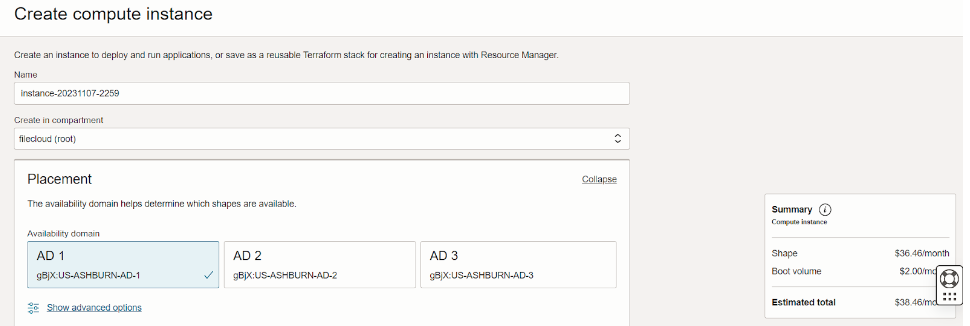
In the Create compute instance page, enter the details of the instance.
- In Name, enter an instance name or use the default name.
- Scroll down to the Add SSH keys box, and generate and save the SSH private key.
It is recommended that you select Generate a key pair for me, and then click Save private key.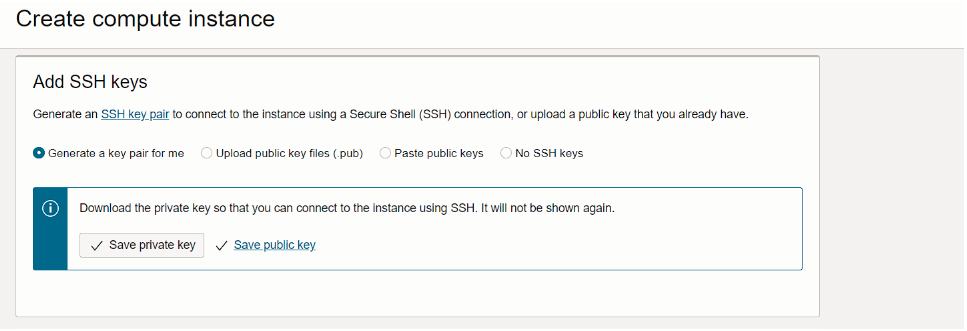
- Scroll down to the Boot volume box.
- By default, the boot volume size is 46.6 GB. You may check Specify a custom boot volume size and enter a custom size.
- For better performance, increase VPU (volume performance units) to 30 or higher.
- For greater security, check Use in-transit encryption.
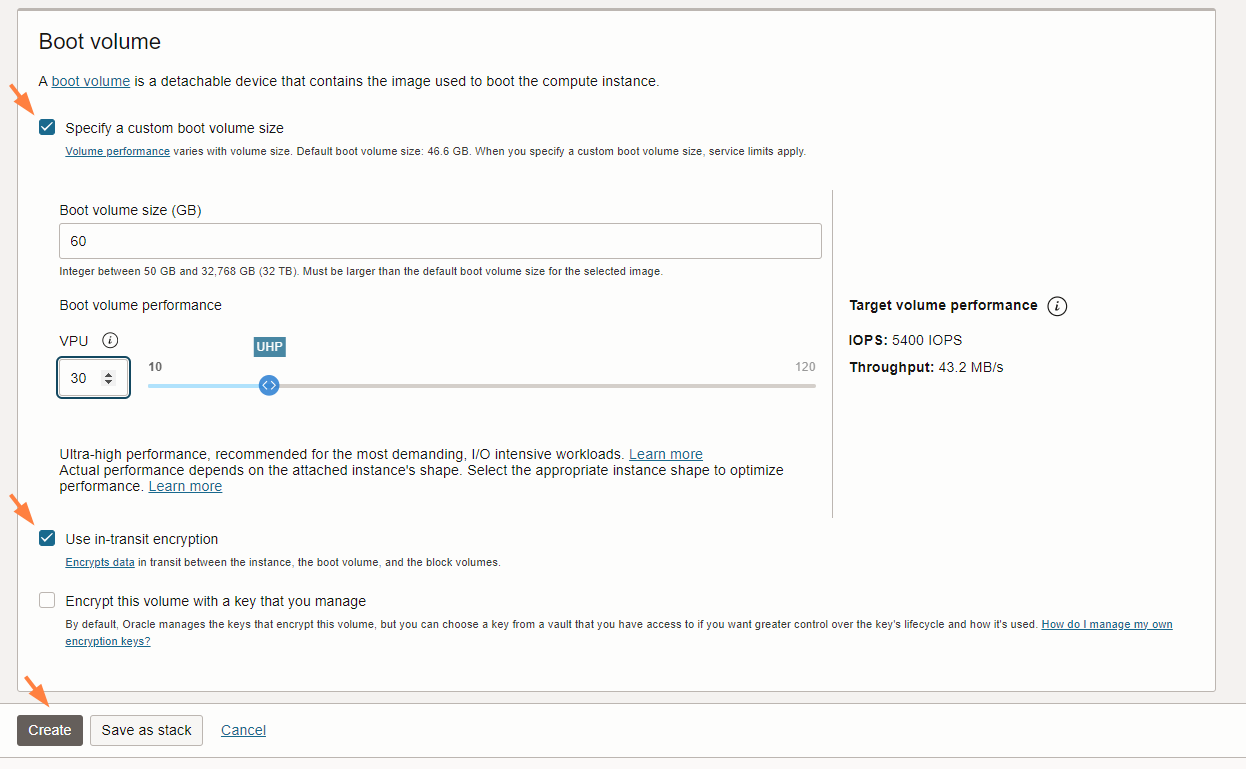
- Click Create.
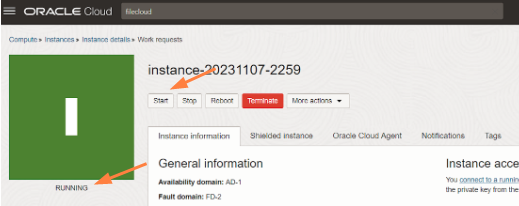
A page with the instance details opens. - When the status RUNNING appears, click Start.
Connect to the instance
- If you do not have a FileCloud License, register for one at portal.filecloud.com.
- In a web browser, enter the FileCloud admin portal URL:
http://<public_dns_name>/ui/admin/index.html - In the login page, enter the username and password admin/password.
You must change the username and password after your first login.
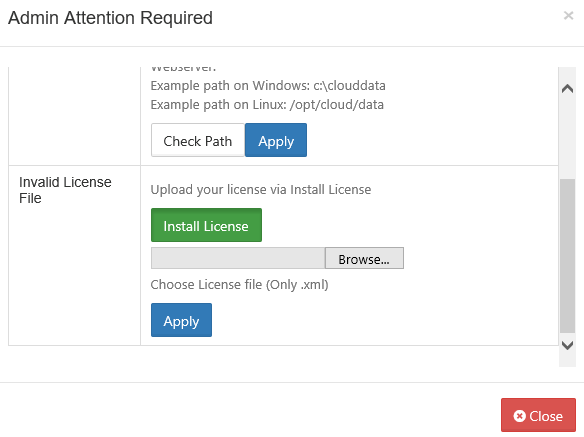
The Admin Attention window opens. - Install the FileCloud license through this window.
Perform post-installation tasks
After you have connected to your instance, perform post-installation tasks:
- Delete the installation folder.
- For better security, change the default SMTP servers and accounts used to send emails to your own servers. See Email Settings.
- In Settings > Email, and set a valid Email Reply To Address.
- View and familiarize yourself with the FileCloud components by navigating to http://<public_dns_name>/install in a web browser.
- To set up FileCloud, follow the instructions at FileCloud Site Setup.
- Take periodic snapshots of your running instance for disaster recovery and as additional backup for the FileCloud database and app.