The wiki in an AirSend channel is an easy to access place where you and the other members of the channel can enter notes about the topic or project the channel is based on.
To access the wiki after you open a channel, click the Wiki tab in the right panel. Before anything is added to the wiki, it appears as:
Any member of the channel can add content to the wiki.
- In the upper-right corner of the wiki, click the edit (pencil) icon.
An Edit Wiki page opens. It contains a panel displaying files in the channel, a panel for adding the wiki entry, and a panel for previewing the wiki entry: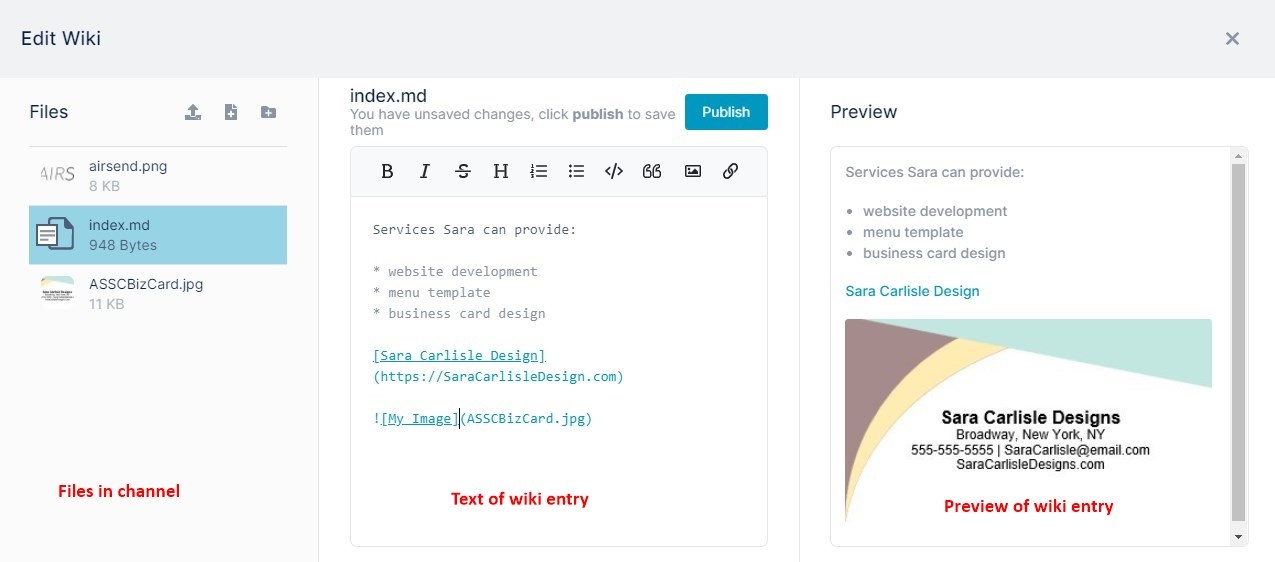
- Enter text into the text editor in the center panel. A preview of the text appears in the right panel.
- To add a link to the text, click the link icon in the toolbar in the center panel.
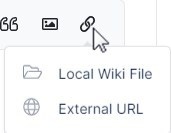
- If you choose External URL, a link placeholder appears.

- Overwrite the format with the text for your link and the link address as shown in the image above.
- Click Local Wiki File, to open a dialog box that enables you to link to a file from the left panel.
- Select a file.
A link placeholder appears. Change the text for the link. The correct link address is inserted for you.
Note: If you choose an image using Local Wiki File, a link to the image, not the image itself, is inserted. - To insert an image in the wiki entry, click the image icon in the toolbar of the center panel.
If the image that you want to insert does not appear in the left panel (that is, it has not been added to the channel) you can upload or create it now. See Adding an image during wiki editing. - Choose a file and click Pick file.
You do not have to edit the link. The right panel displays the image. - In the center panel, click Publish.
The entry appears in the wiki:
Overview
Content Tools
Apps