Creating a Smart Classification Rule
A Smart Classification rule specifies:
- The classifier that categorizes your content a certain way (for example, by regex or by AI)
- The pattern to match
- The metadata to apply to the file depending on whether a pattern match is found
For example, a rule could specify that Smart Classification should attempt to match an ID number pattern in the content of a file, and to set the metadata variable PII to yes or no depending on whether or not there is a match.
When you automate running of a Smart Classification rule, it classifies all existing files in FileCloud, and then runs on each file that is added or updated. The initial run may be lengthy since many files may have to be classified. If you don't automate running of a rule, and only run it manually, during each manual run it classifies all content in FileCloud. If you have a large number of files, each manual run may take a long time.
The following procedure uses an example in which the Default classifier, a regex classifier, is used with the predefined pattern for U.S. social security number.
To create a smart classification rule:
- In the navigation panel, click Smart Classification.
The Smart Classification screen opens. - In the menu bar, click Rules if it is not already selected.
- Click Add rule.

The General screen of the Add Content Classification Rule wizard opens. - In Rule name, enter a name for the rule.
- In most cases, you will enable Automatic execution so the rule runs automatically on a schedule on files added and updated since the last run.
If you only want to run the rule manually, leave it disabled.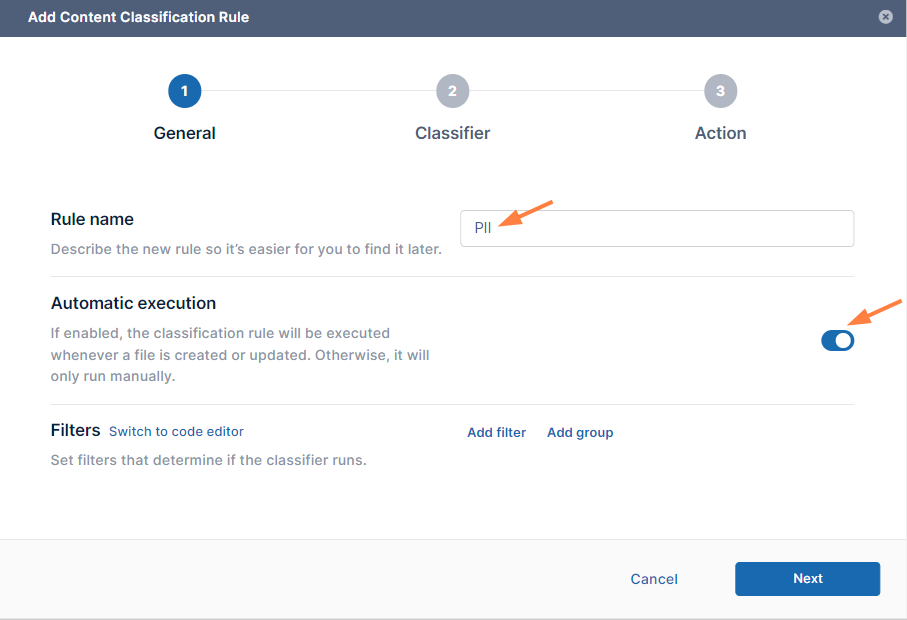
- Click Add Filter, and choose a predefined condition, and set the numerical value.
Note: The final filter value in the drop-down list, Anything, applies no filter (allows all files to be classified).
In this example, the predefined condition File size is less than value is chosen.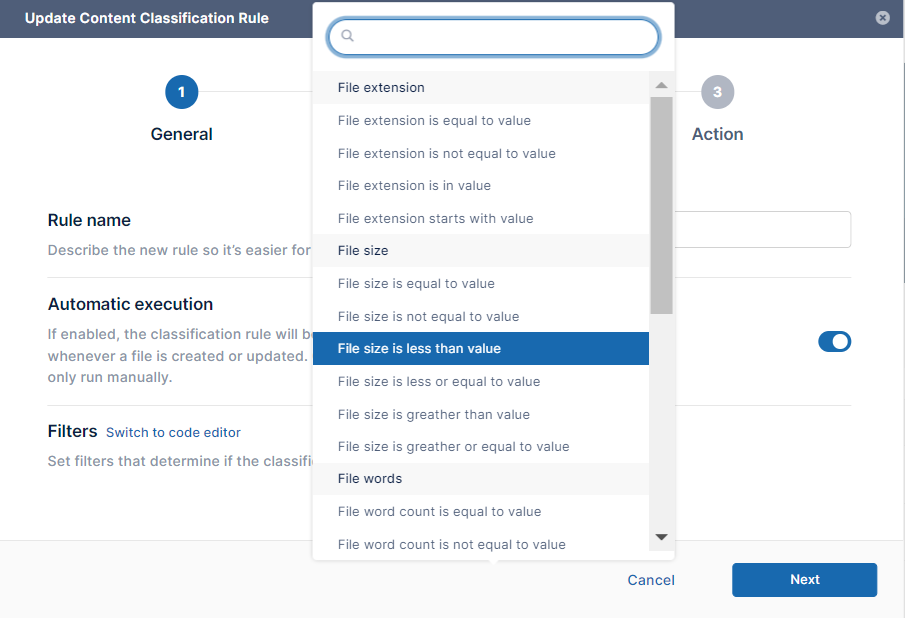
- For this example, the value is set to 5 MB.
Note: Files greater than 10 MB are not available to be classified.
Notes:- You can add complex conditions by using the Add filter and Add group options together. Clicking Add filter ANDs another condition to the first.
Clicking Add group adds a group of conditions that are ANDed to each other, and as a whole, ANDed to the previous condition. - Alternately, you can click Switch to code editor, and write your condition in Expression Language if you are familiar with it. For help with expression language, see https://symfony.com/doc/current/reference/formats/expression_language.html.
- If you want to switch an AND condition to an OR condition click the word AND (and click OR to toggle it back to AND).
- You can add complex conditions by using the Add filter and Add group options together. Clicking Add filter ANDs another condition to the first.
- Click Next.
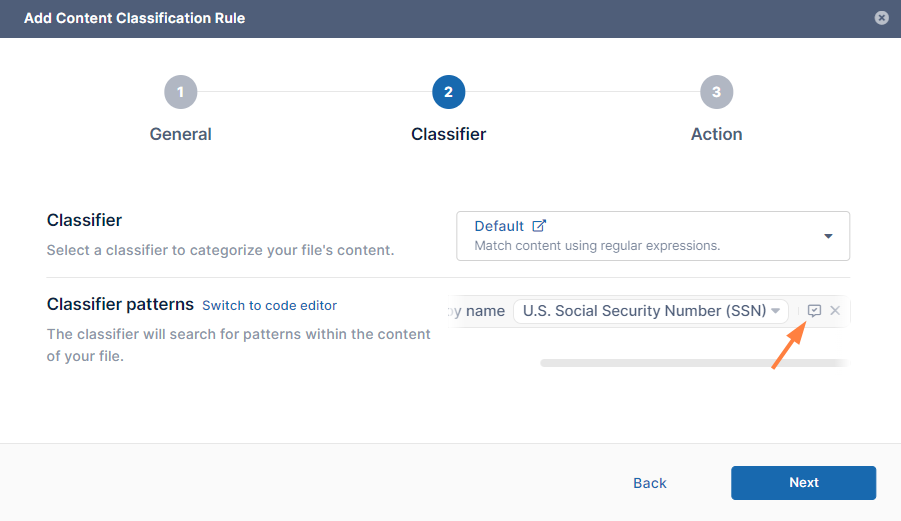
The Classifier screen of the wizard opens. - In the Classifier drop-down list, choose a classifier.
In the example below, the classifier Default is chosen.
For help using classifiers, see Guide to Classifiers
Note: If you choose the ICAP DLP or the Singapore NRIC classifiers, the classifier pattern is preset, so the Add Pattern option below no longer appears on the screen. - After you choose a Classifier, if Classifier patterns still appears below it, click Add Pattern.
The options vary depending on the classifier you have chosen. For help entering the pattern for each option, see Guide to Classifiers.
In this example where the Default classifier is used, when Add Pattern is clicked, the options Match RegEx, Match pattern by name, and Match pattern by group are shown. - Click one of the options.
Here, Match pattern by name, which enables you to choose a predefined pattern, is chosen.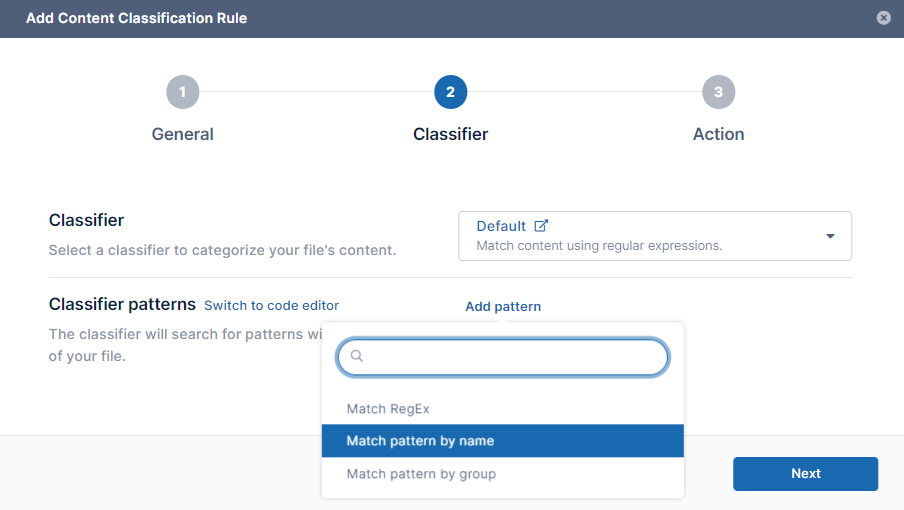
- Choose a predefined pattern in the Choose a pattern drop-down list.
U.S. Social Security Number is chosen.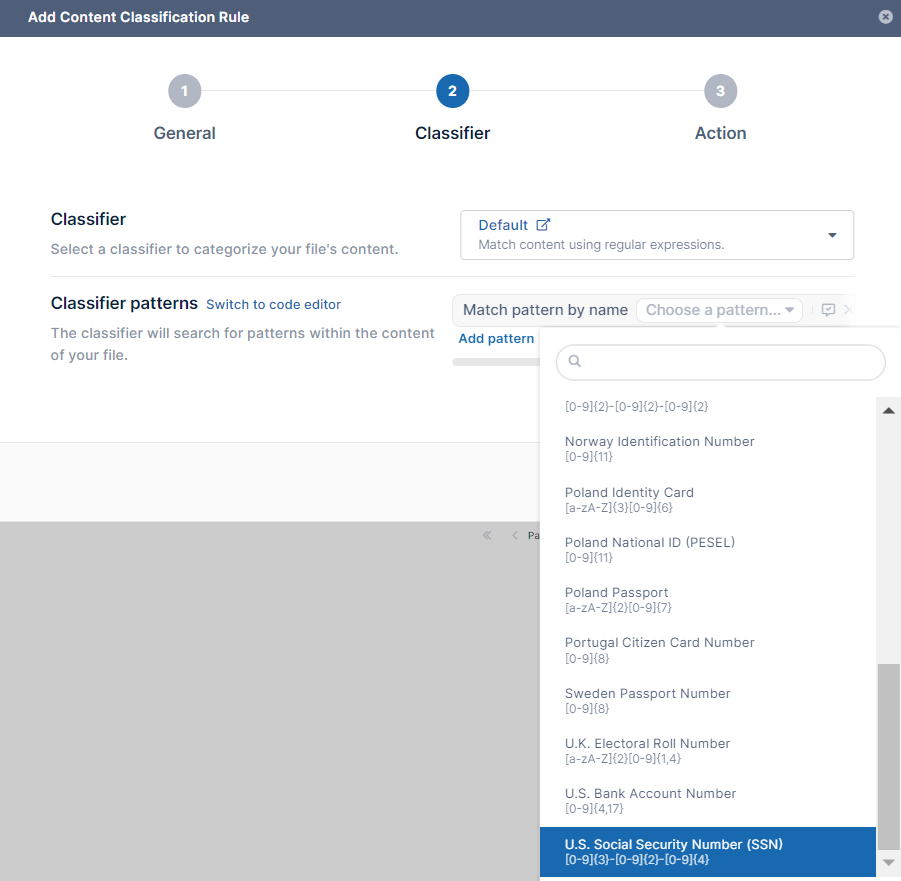
- To test the pattern, click the Test Pattern icon next to the pattern.
You are prompted to enter a sentence that includes your pattern in the box that opens. Include the pattern any number of times.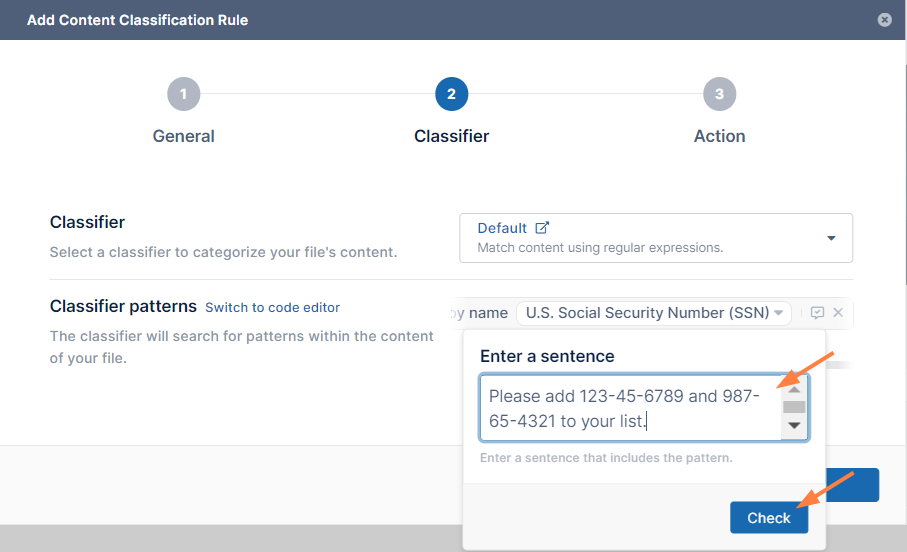
- Click Check.
If the Classifier pattern is working, the terms that match the pattern in your sentence are highlighted and a count of the number of matches appears below the sentence.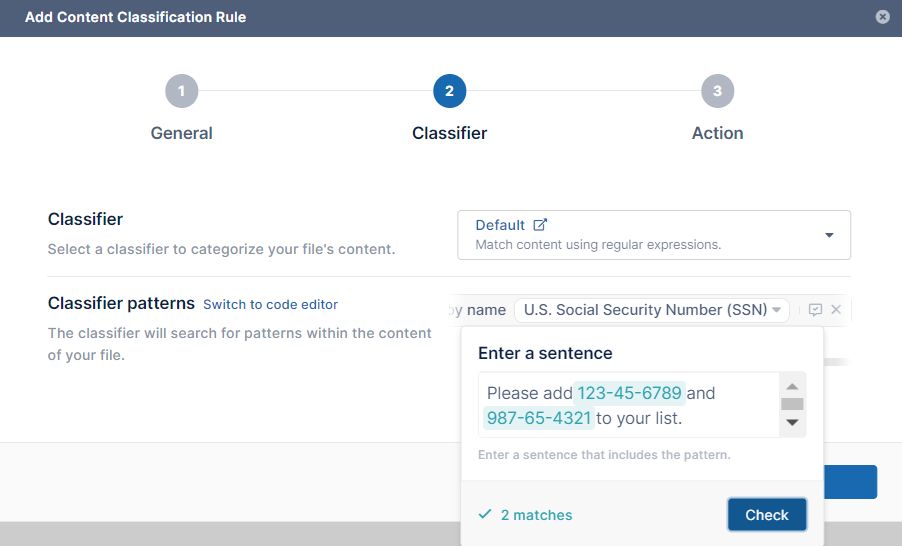
- If the pattern is successful, click Next.
The Action screen of the Add Content Classification Rule wizard opens. - Add a Classifier condition.
Notes:- In many cases you can click Add condition and choose Number of matches is greater than value, and set value to 0.
- In most cases, there is no need for a complex condition, and choosing Add group is not necessary.
- If you add multiple Classifier conditions, you can switch an AND condition to an OR condition by clicking the word AND. Click OR to toggle it back to AND.
- If you are familiar with Expression Language, you can click Switch to code editor and add a condition in Expression Language.
In this example the condition Number of matches is greater than value is added.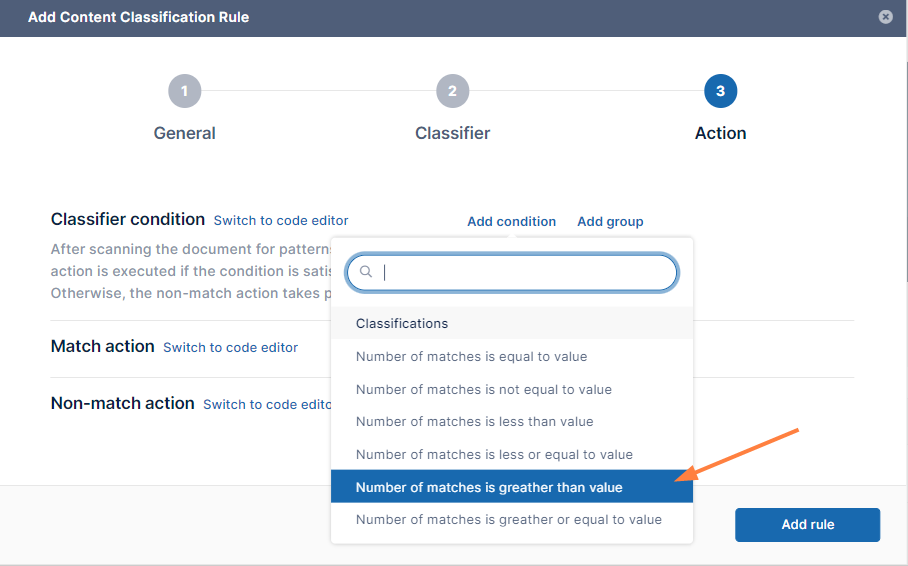
The classifier condition is added and by default set to 0. In most cases, you can leave the value of 0, but if you only want the classifier to treat the result as a match if more than 1 matches are found, enter a number greater than . 0
0
- Add a Match action either by clicking Add action and choosing Set metadata to value, or, if you are familiar with JSON, by clicking Switch to code editor, and adding an action in JSON.
Any number of actions may be added.
In this example, Add action is clicked and the only current option, Set metadata to value, is chosen.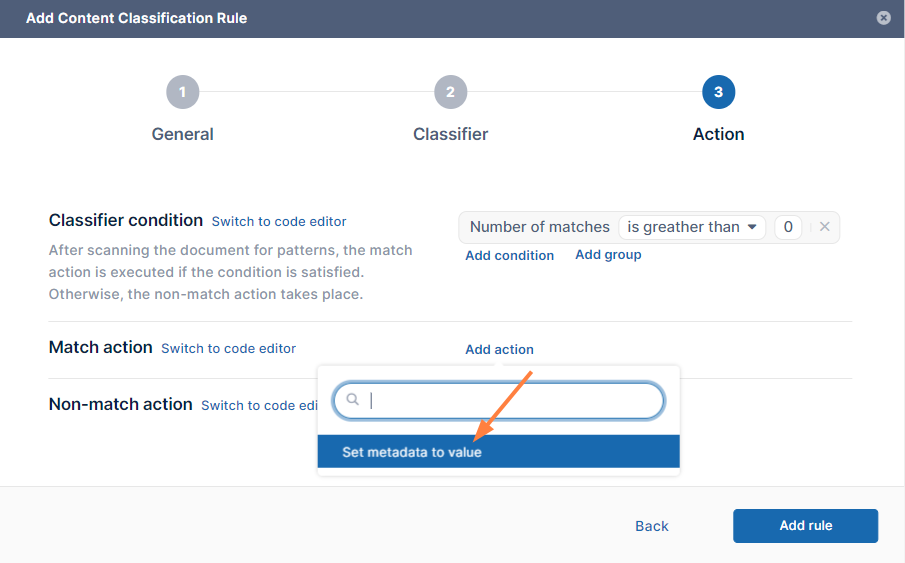
- Click in the Choose a metadata field. Color Tagging metadata and any custom metadata you have created is listed with its attributes below it.
- Click one of the metadata attributes.
In this example, the PII metadata attribute found is selected.
- Set a value for the metadata attribute.
Here found is set to yes.
In another process, such as DLP or a search, this enables FileCloud to locate files with PII information in them by looking for files with PII.found set to yes. - Repeat the process for Non-match action.
In this example, the same metadata attribute is chosen, but it is set to no.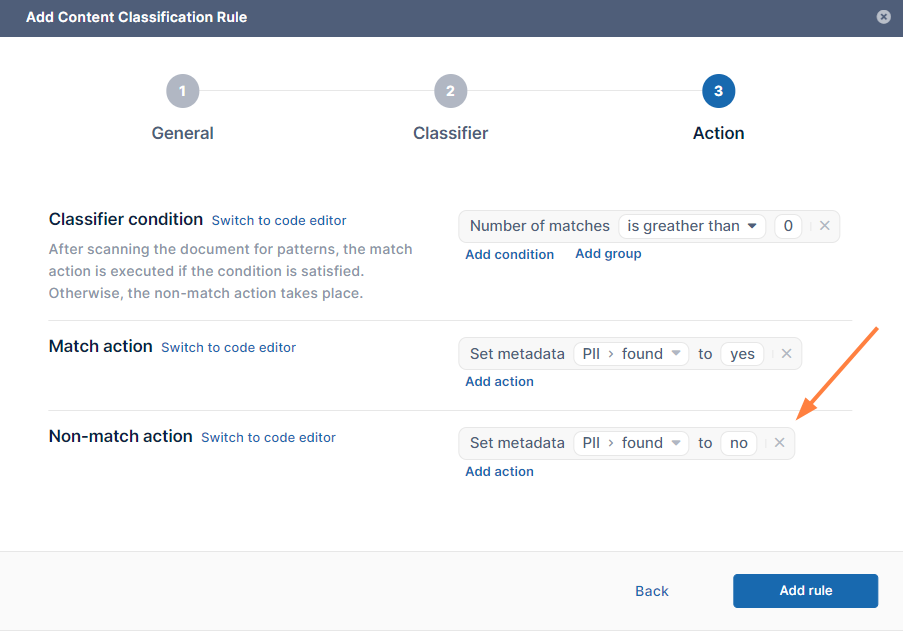
Your rule is complete. - Click Add rule.
The wizard closes and your rule is added to the Smart Classification page.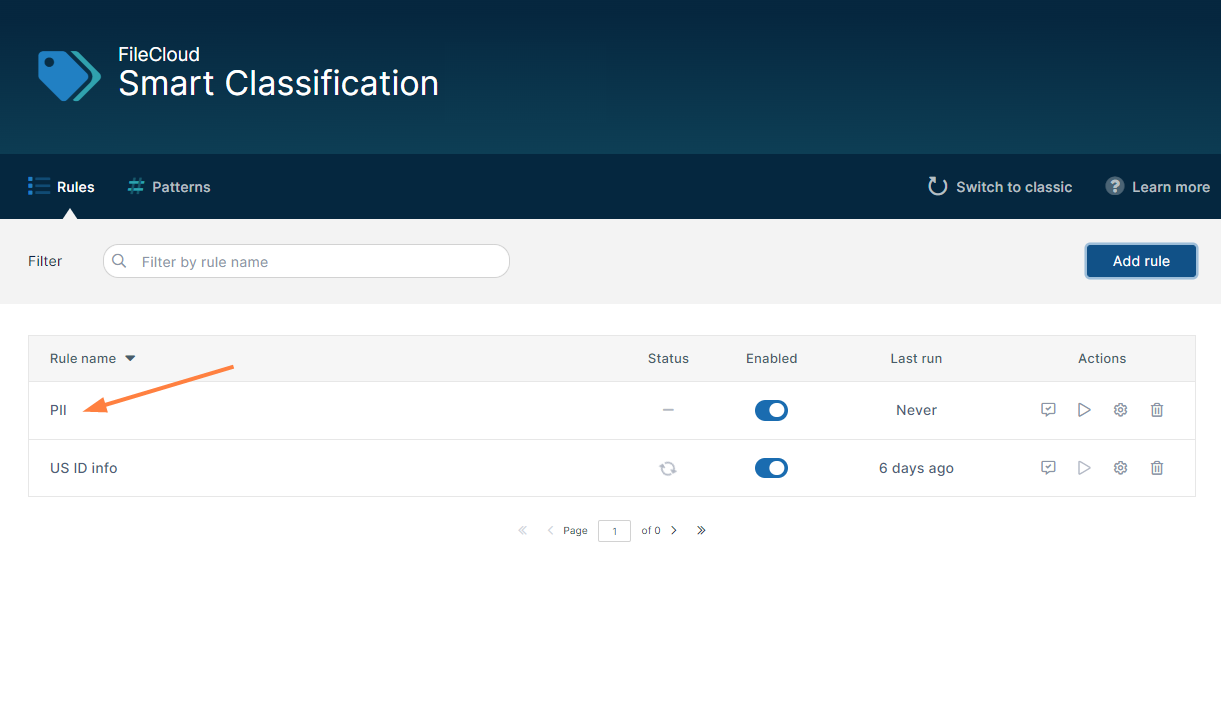
Since you created the rule to run automatically, it appears as enabled, and will run according to the Cron schedule. However, you can run it manually at any time by clicking the arrow under Actions.