You are viewing an old version of this page. View the current version.
Compare with Current
View Page History
« Previous
Version 6
Next »
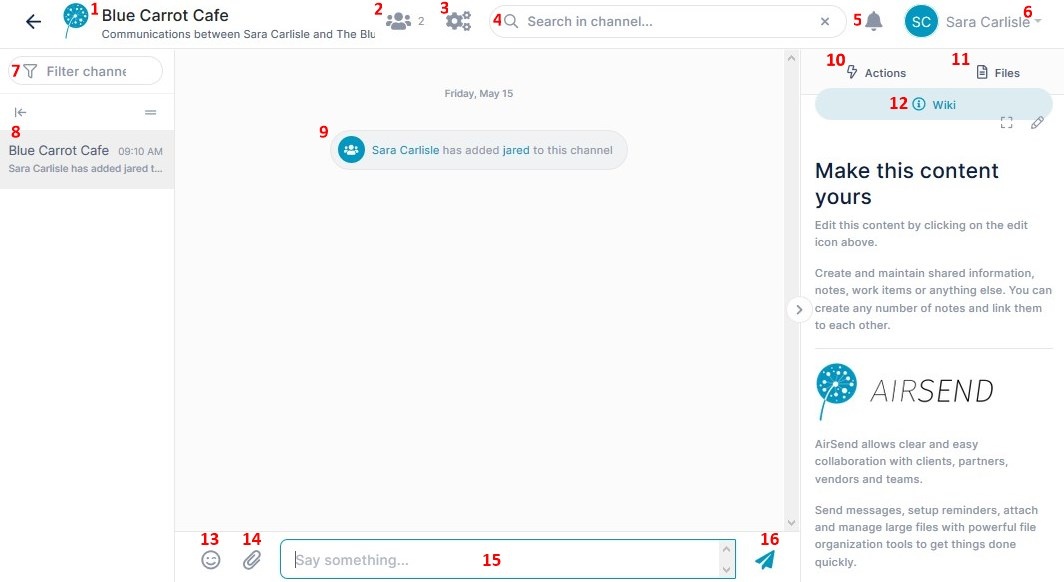
The AirSend channel screen
| - Name of the channel.
In this example, the channel name is Blue Carrot Cafe. - Number of members of the channel. This includes the user who created the channel and all the other users they have added.
There are 2 members in this channel, Sara Carlisle, the channel creator, and jared, a user she has added. - Settings. Channel information and configuration opens. See Channel settings.
- Search box. Enter a search term to search through the content of messages for matching messages.
- Notifications. This icon displays the number of unread notifications. Hovering over it displays the notifications. See The AirSend Dashboard for more information..
- User signed in to the channel, in this case, Sara Carlisle. Click the down arrow to see a user menu. See The AirSend Dashboard for more information..
- Filter channel.
- Actions list.
- Messages. Since this is a new channel, there are no conversations yet. The chat area also displays notifications when actions occur.
- Actions. Any member of the channel can click this tab to view and add actions that all members of the channel can see. See Adding actions.
- Files. Any member of the channel can click this tab to attach files and access files that other users have added. See Adding files.
- Wiki - A notepad where any member of the channel can add notes that all members can see. See Sharing a Wiki in an AirSend channel
- Emoji - Click to add an emoji to your message.
- Attachment - Click to attach a picture or file to your message. The picture or file also appears in Files in the right panel.
- Message box - Type in your message here, then click xxxxx.
- Send - Click to send your message. It appears in the Chat area.
|