You are viewing an old version of this page. View the current version.
Compare with Current
View Page History
« Previous
Version 4
Next »
The AirSend iOS app enables you to use your AirSend account on your iOS device in the same way you use it on your desktop computer. For the most part, you can refer to the general AirSend help topics for information about using AirSend features on your iOS device.
For help installing and logging in to AirSend from your phone and finding features that are located in different places on the mobile interface, refer to this page.
Installing the AirSend iOS app and creating an account
- From the Apple Store, download the AirSend app.
- Open the AirSend app.
- If you already have an AirSend account, enter your email address and password to sign in.
If you do not have an AirSend account, click Sign up, and enter the sign-up information.
Logging in to AirSend from your iOS device
- After you have installed the AirSend app and created an account if you need one, open it on your phone.
- Enter your email address and password.
- Click Login.
If you are not a member of any channels, the initial screen is empty; otherwise, it lists each channel you own or are a member of.
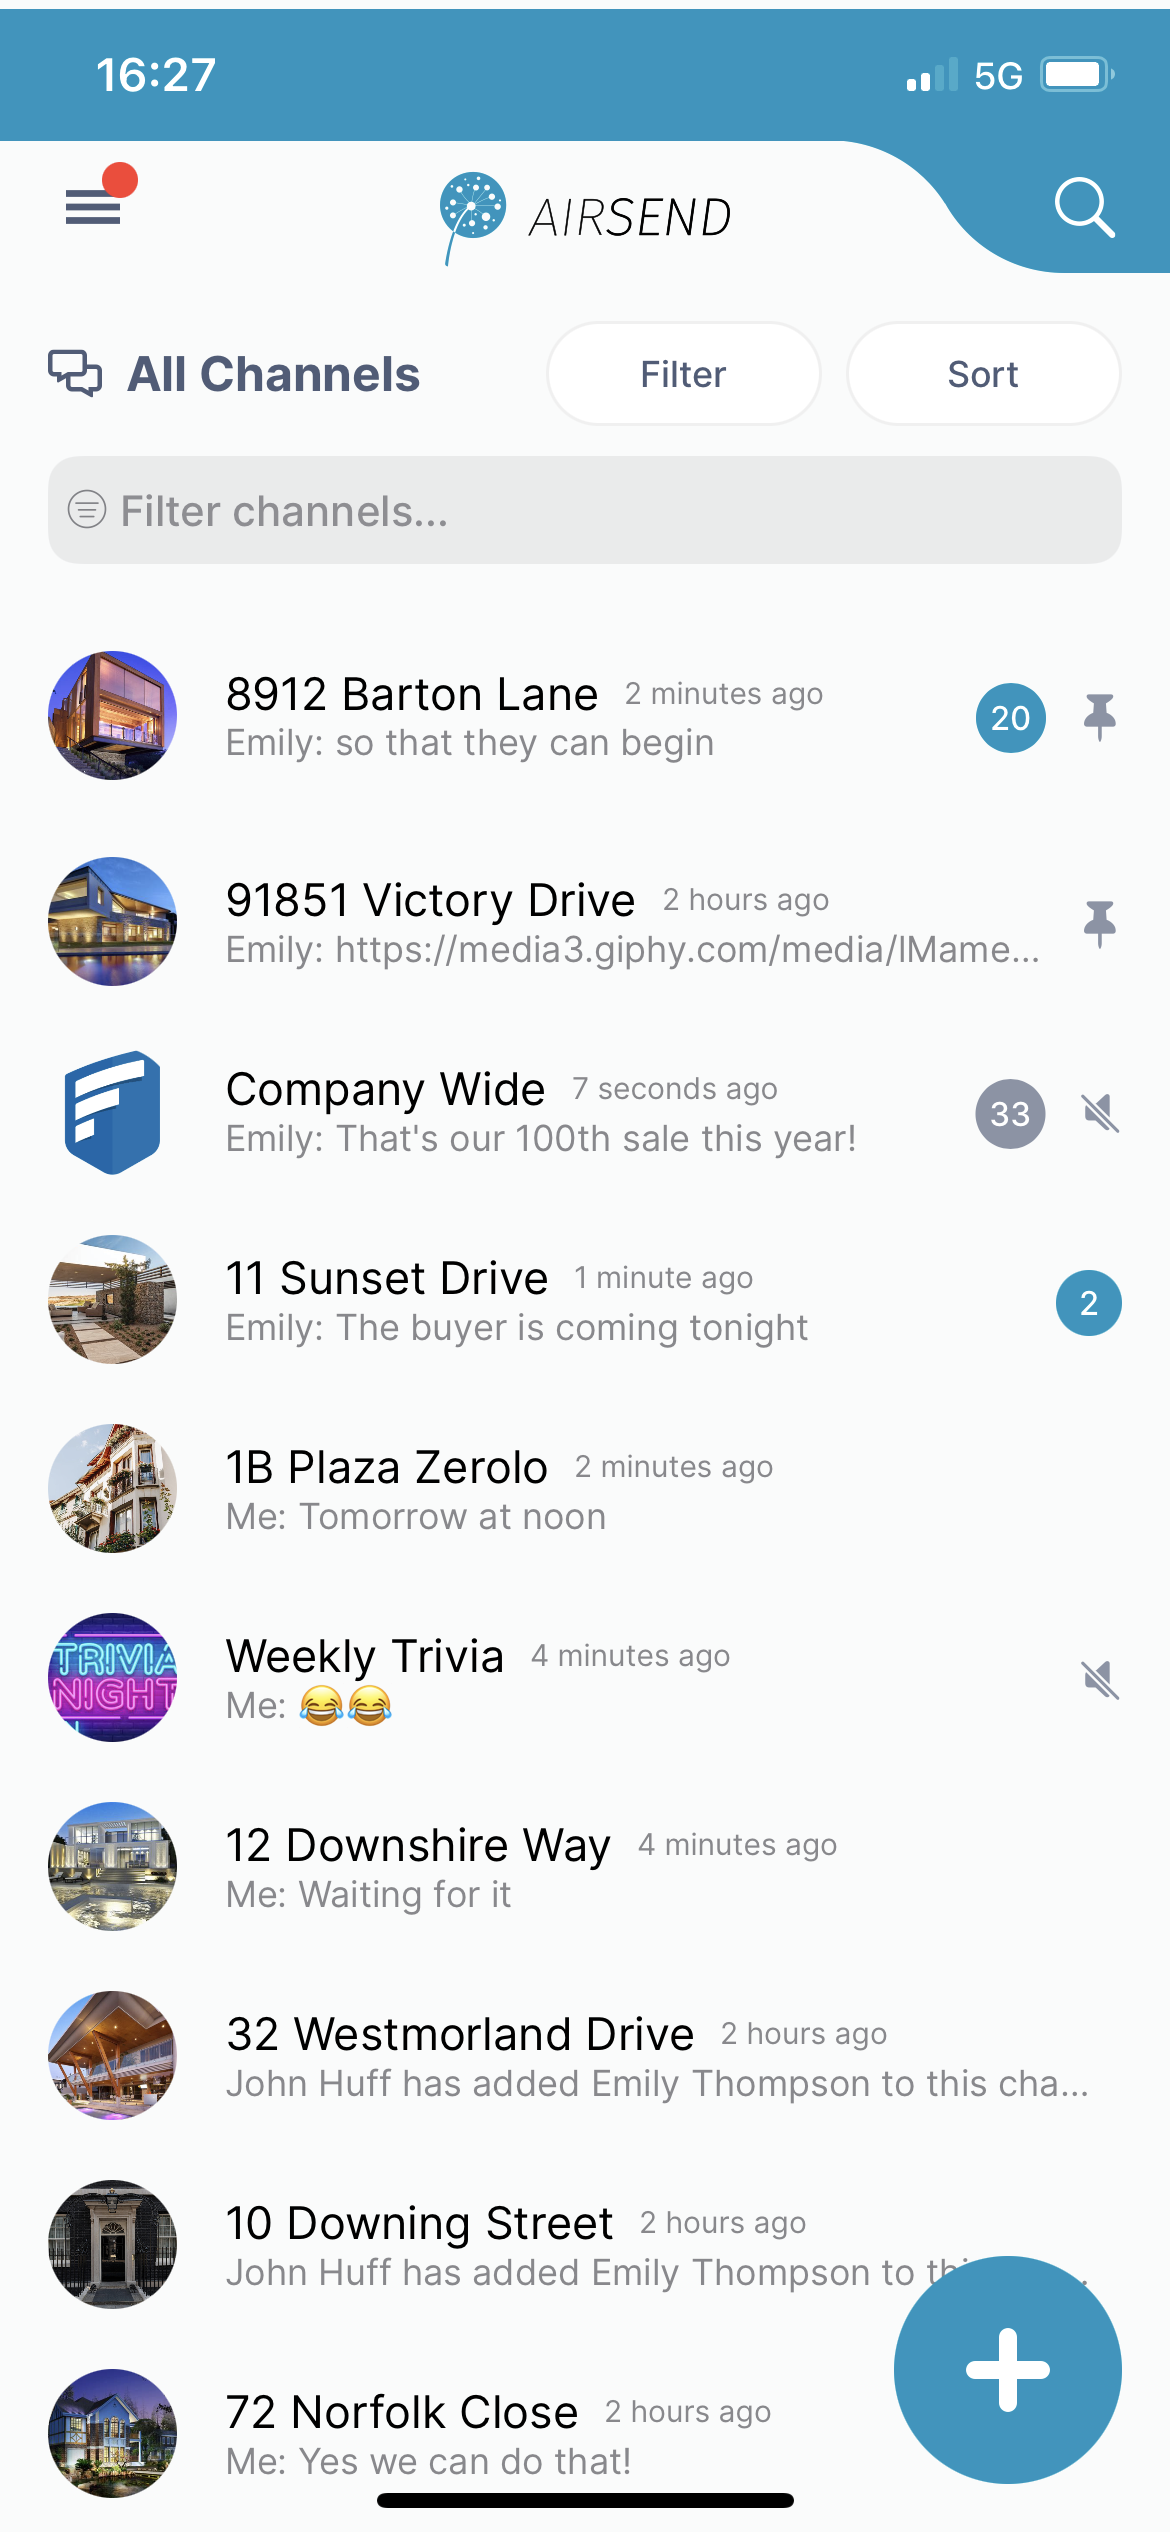
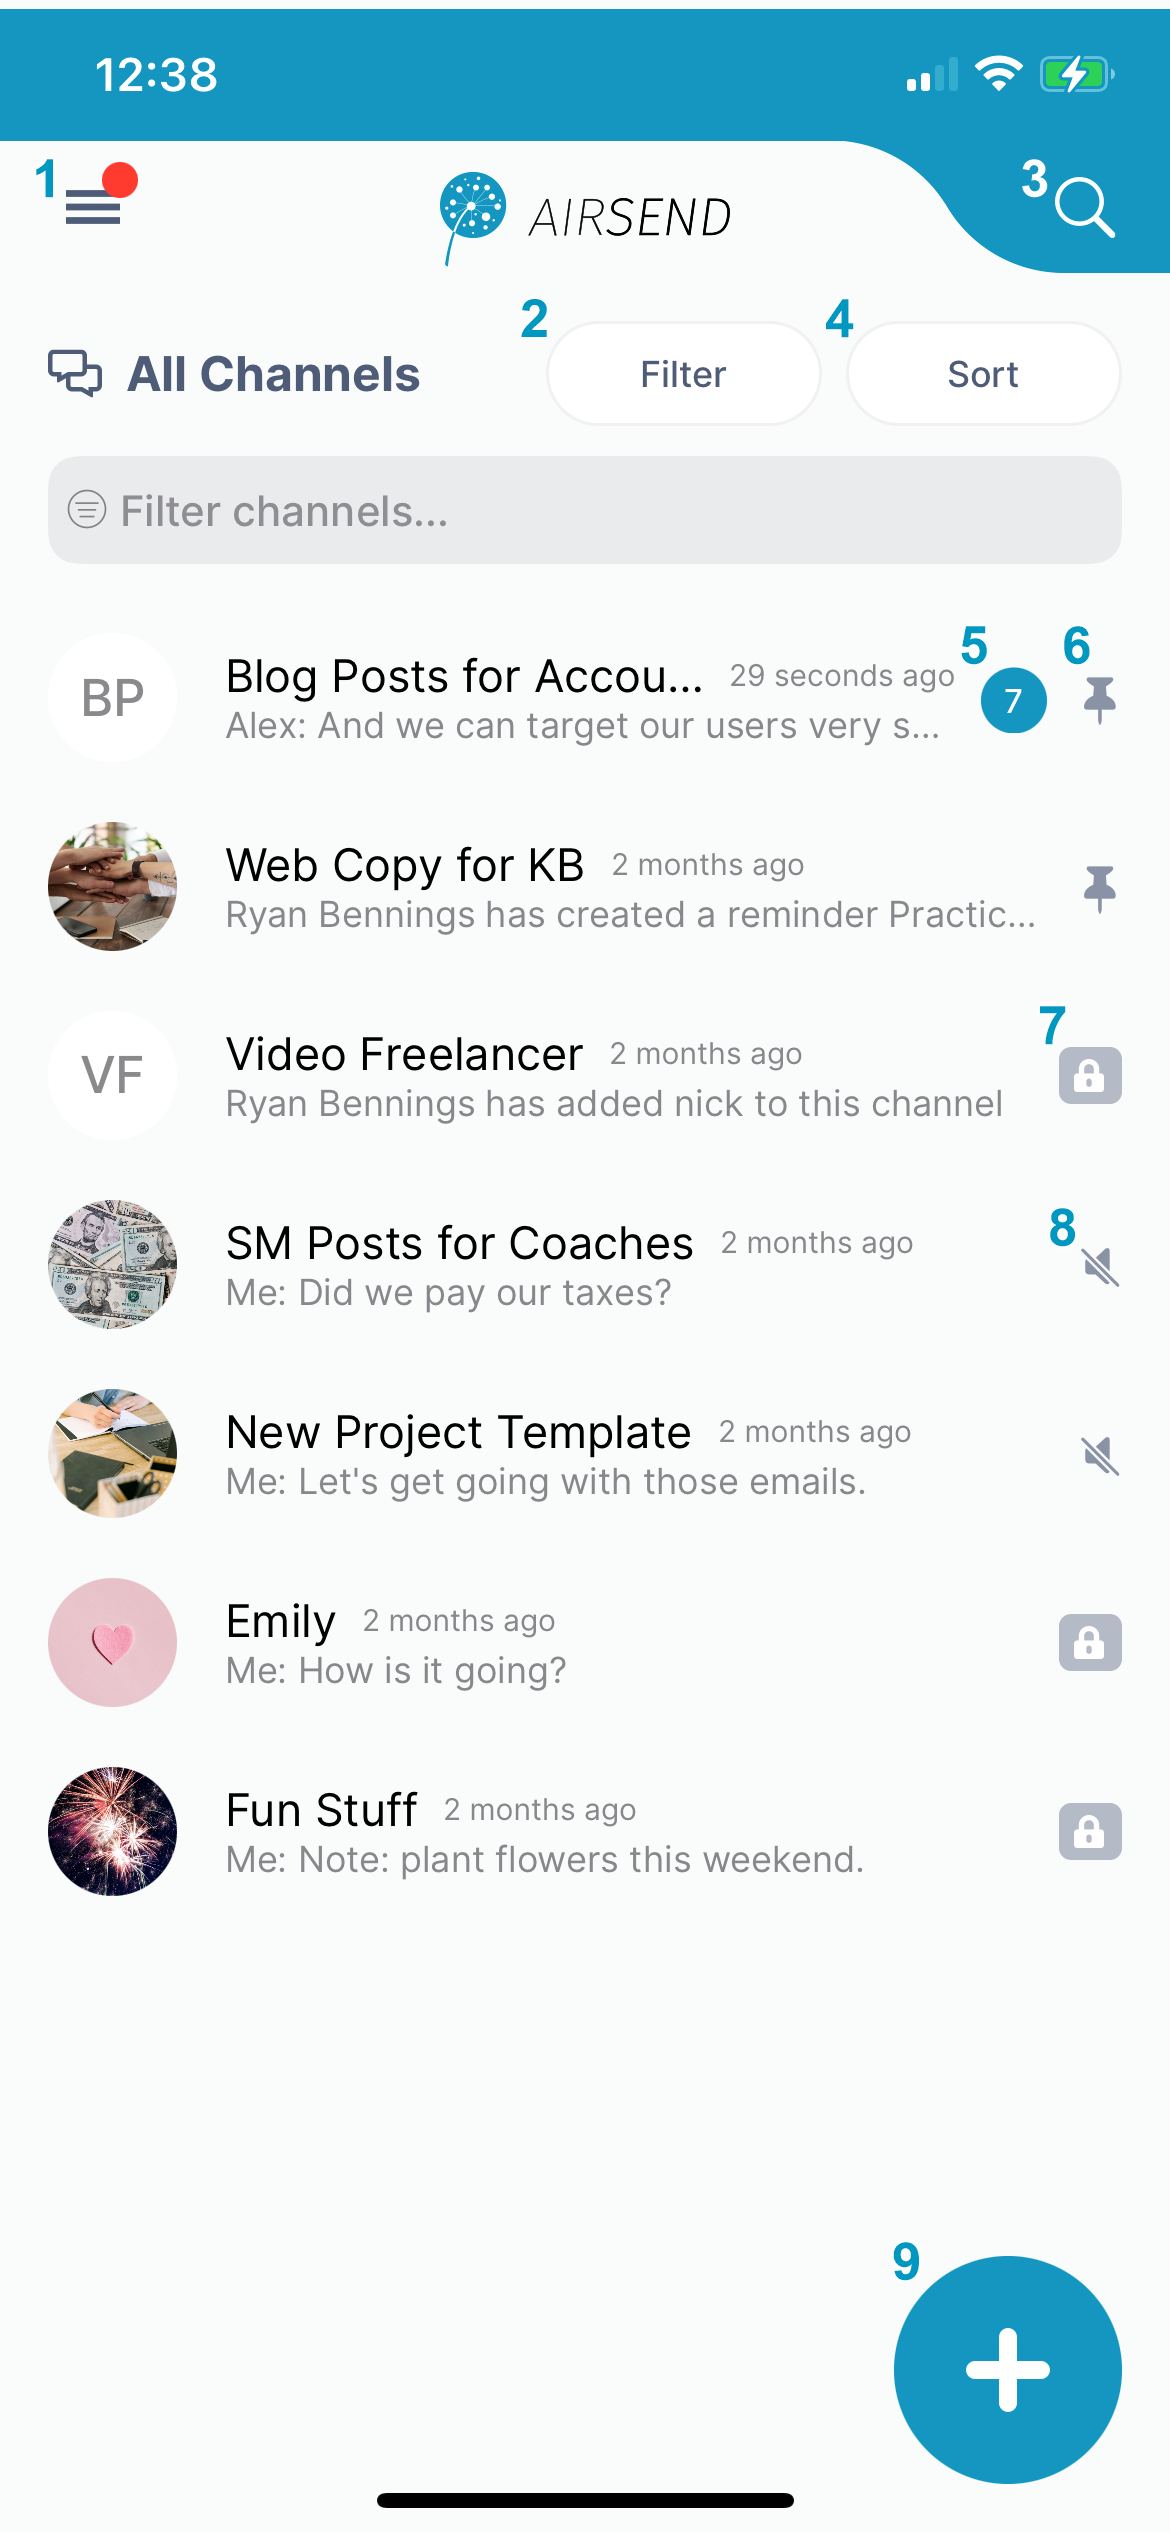
Using the iOS dashboard
| - Triple-bar icon - Click this icon to open the navigation panel. See Navigation panel, below.
- Filter - Click and choose to show all channels, active channels, or closed channels.
- Search - Click and enter a term to search for in messages, file names, actions, and usernames.
- Sort - Click to sort channels by one of the following options:
- Most recently active channel
- Least recently active channel
- Newest to oldest channel
- Oldest to newest channel
- Number – Number of unread notifications in channel.
- Pin - Pin a channel to move it to the top of your list.
Channel options - Options displayed vary for channel owner and members who are not the owner. Option | Visible to owner? | Visible to non-owner? |
|---|
| Duplicate channel | yes |
| | Close | yes |
| | Delete | yes |
| | Leave channel |
| yes | | Members | view, add, delete | view | | Settings | channel name,
description, email | channel name,
description, email |
- Add icon - Click to create a new channel.
|
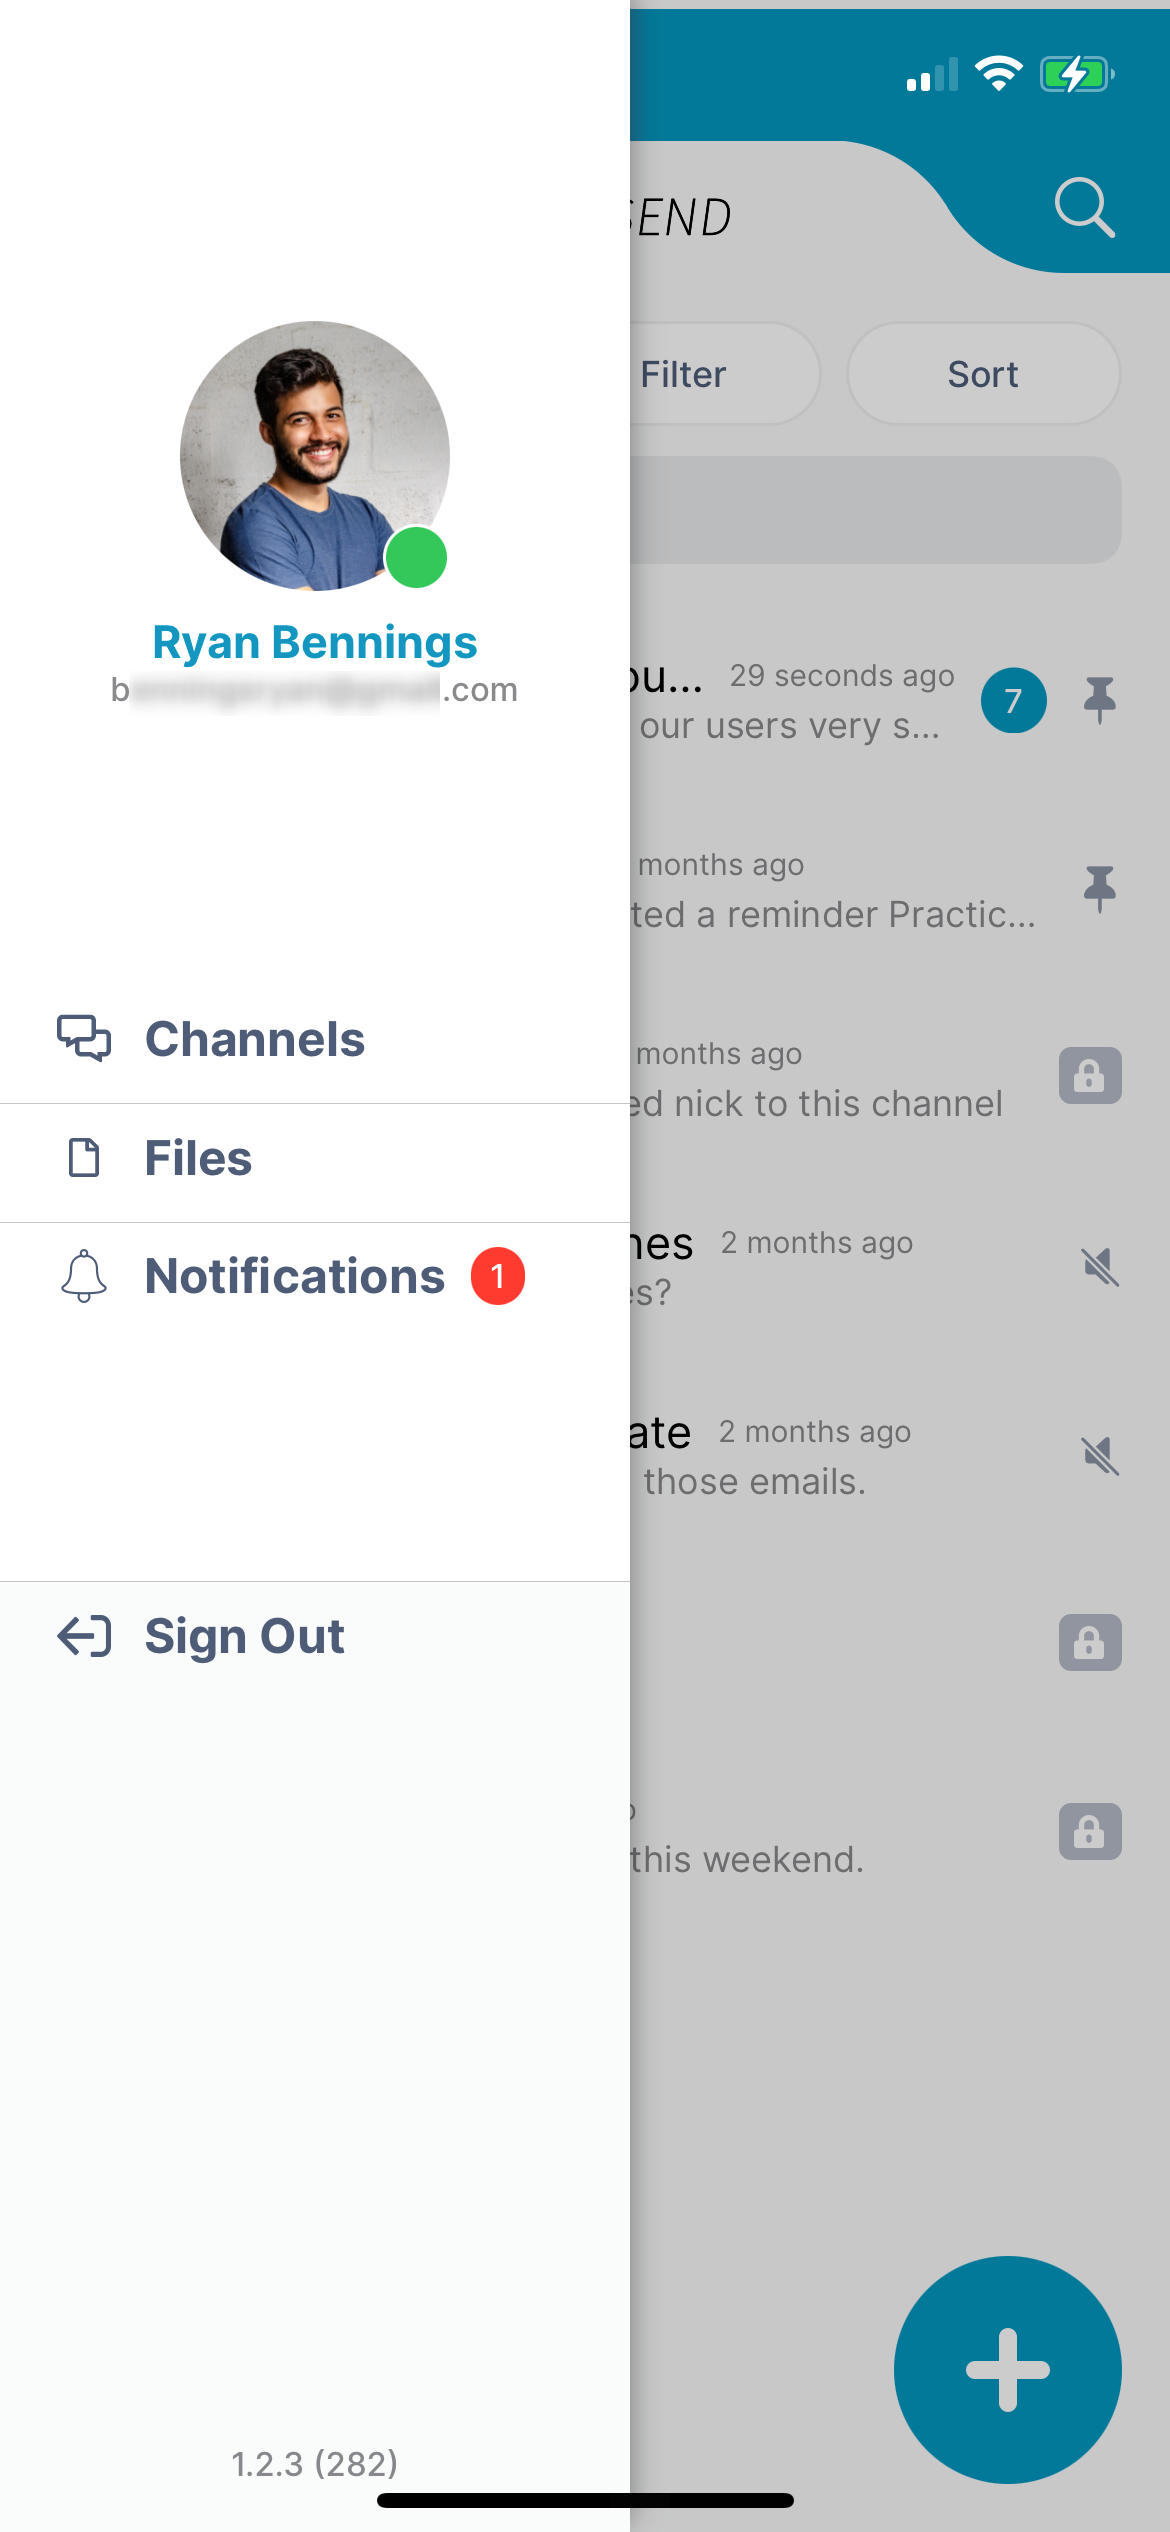
Navigation panel
| You can access different views of the iOS AirSend app from the navigation panel. Channels view is described above under Using the IOS dashboard. |
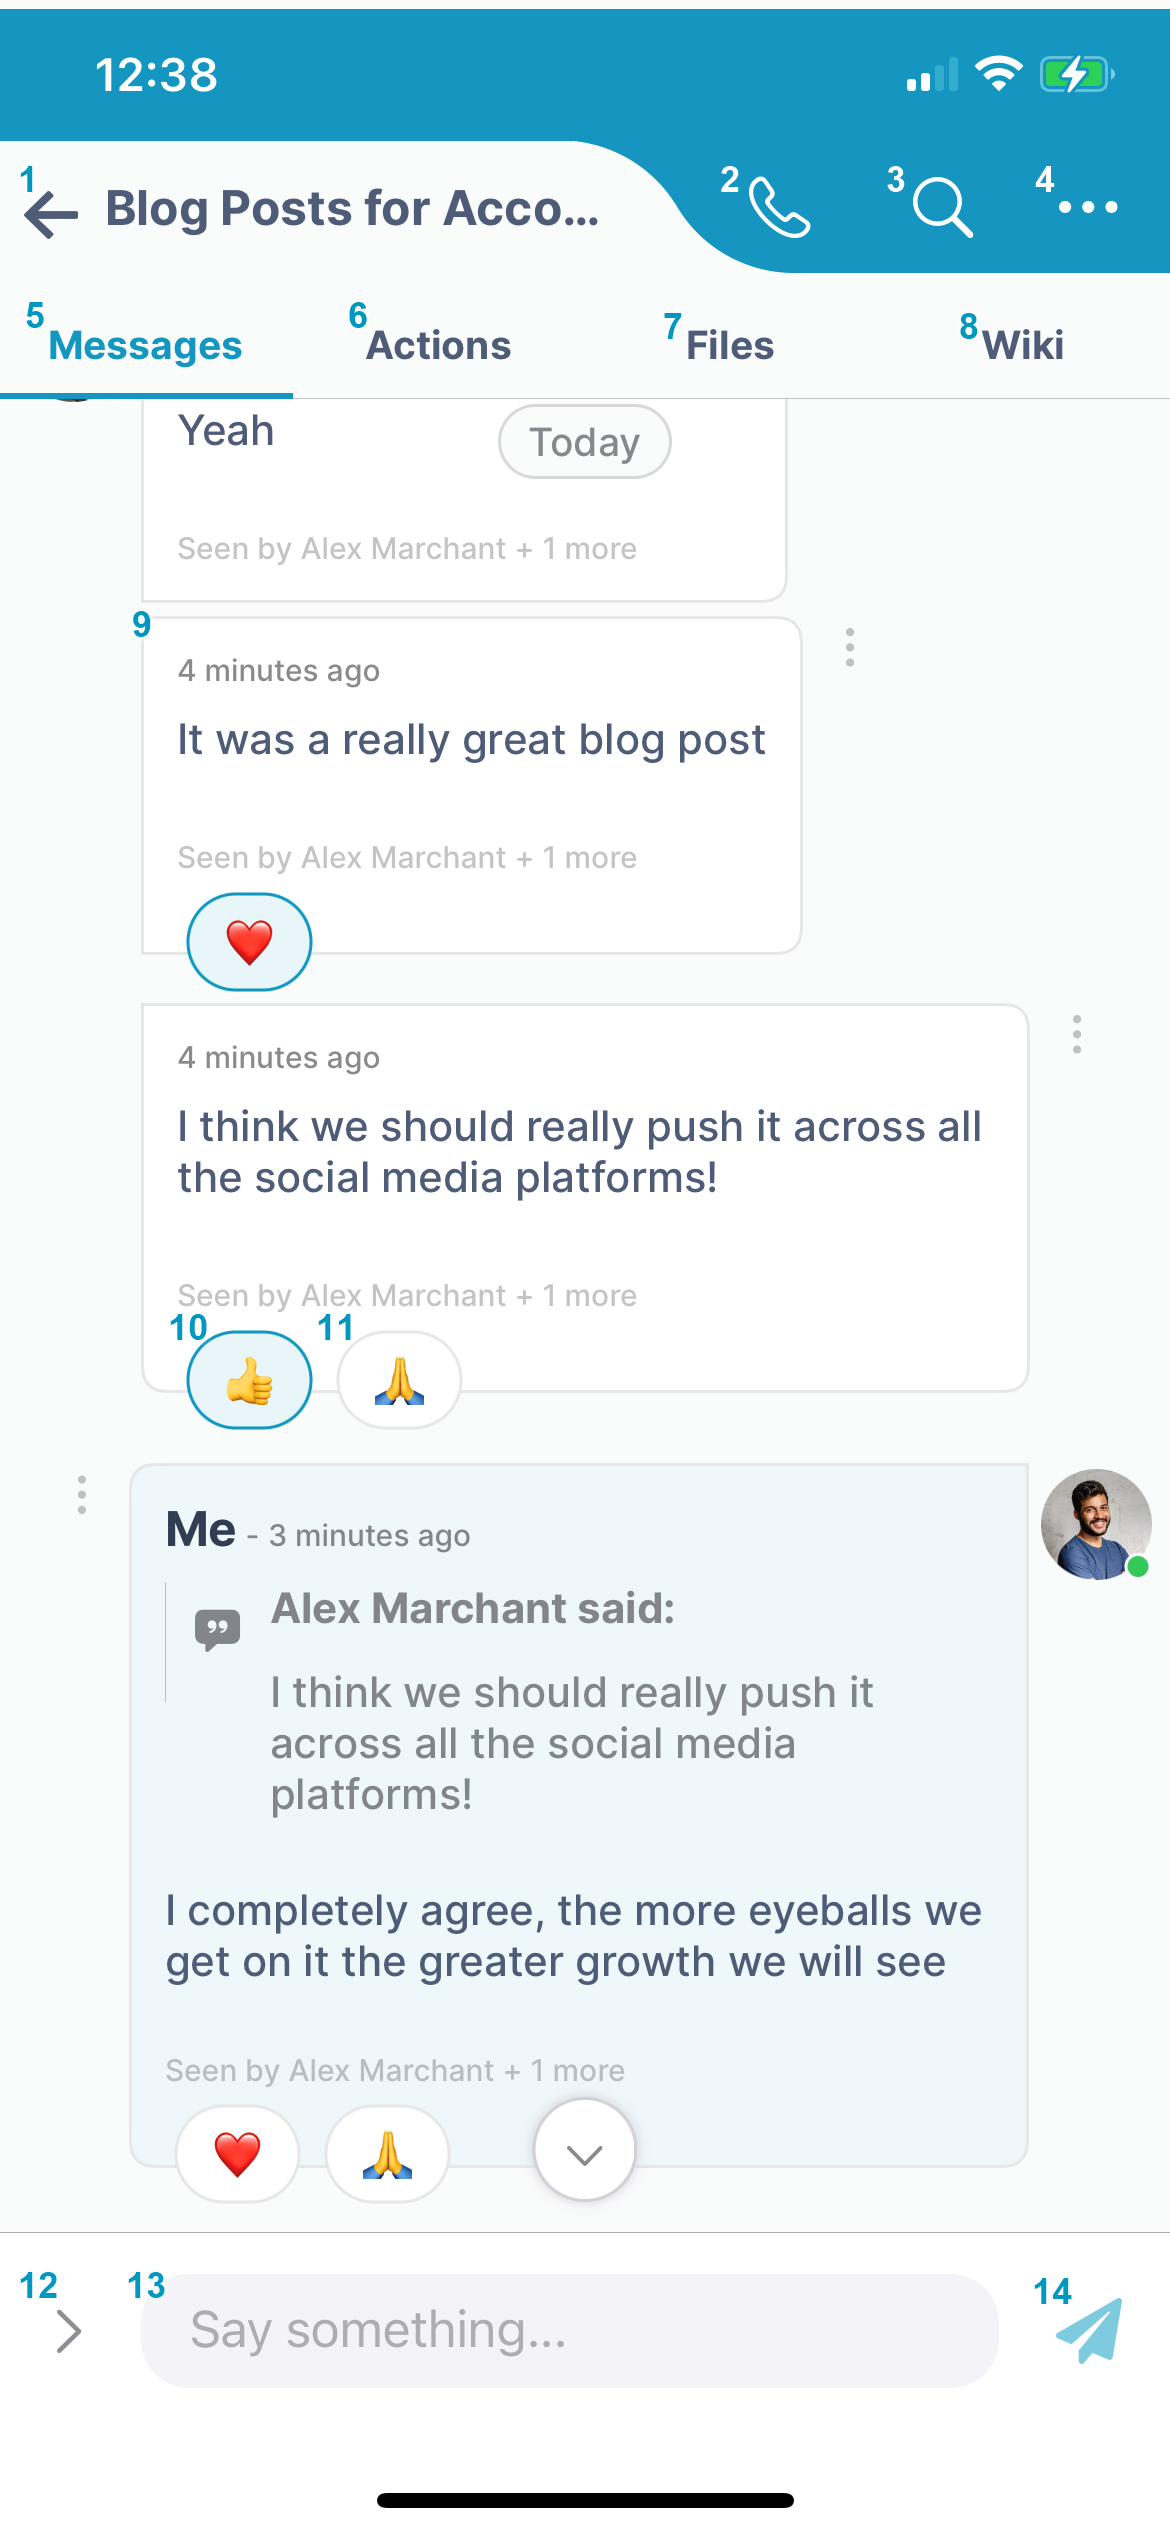
Viewing a channel's messages in the iOS app
| - Back button - Click to go back to the dashboard.
- Tap to start a meeting.
- Search in this channel's messages, actions, files, and users.
- Messages tab - Click to view and add messages.
- Actions tab - Click to view and add actions that all members of the channel can see. See Actions in AirSend.
- Files tab - Click to attach files to the channel and access files that other users have added to the channel. See Add a file to the Files tab.
- Wiki tab - Click to access a section for displaying important information such as instructions, updates, and frequently accessed data. See Wiki: Displaying Important Information.
- Notification.
- Channel member who posted the message.
- Message.
- Tap to reply or react to the message.
- Image button - Tap to attach an image to a message. The image is saved to the channel and is accessible from Attachments folder in the Files tab.
- Emoji button - Tap to add an emoji to a message.
- Attachment button - Tap to add an attachment to a message. The attachment is saved to the channel and is accessible from the Attachments folder in the Files tab.
- Message input box - Type in your message here, then click Enter or the send icon.
- Send icon - Click to send your
|
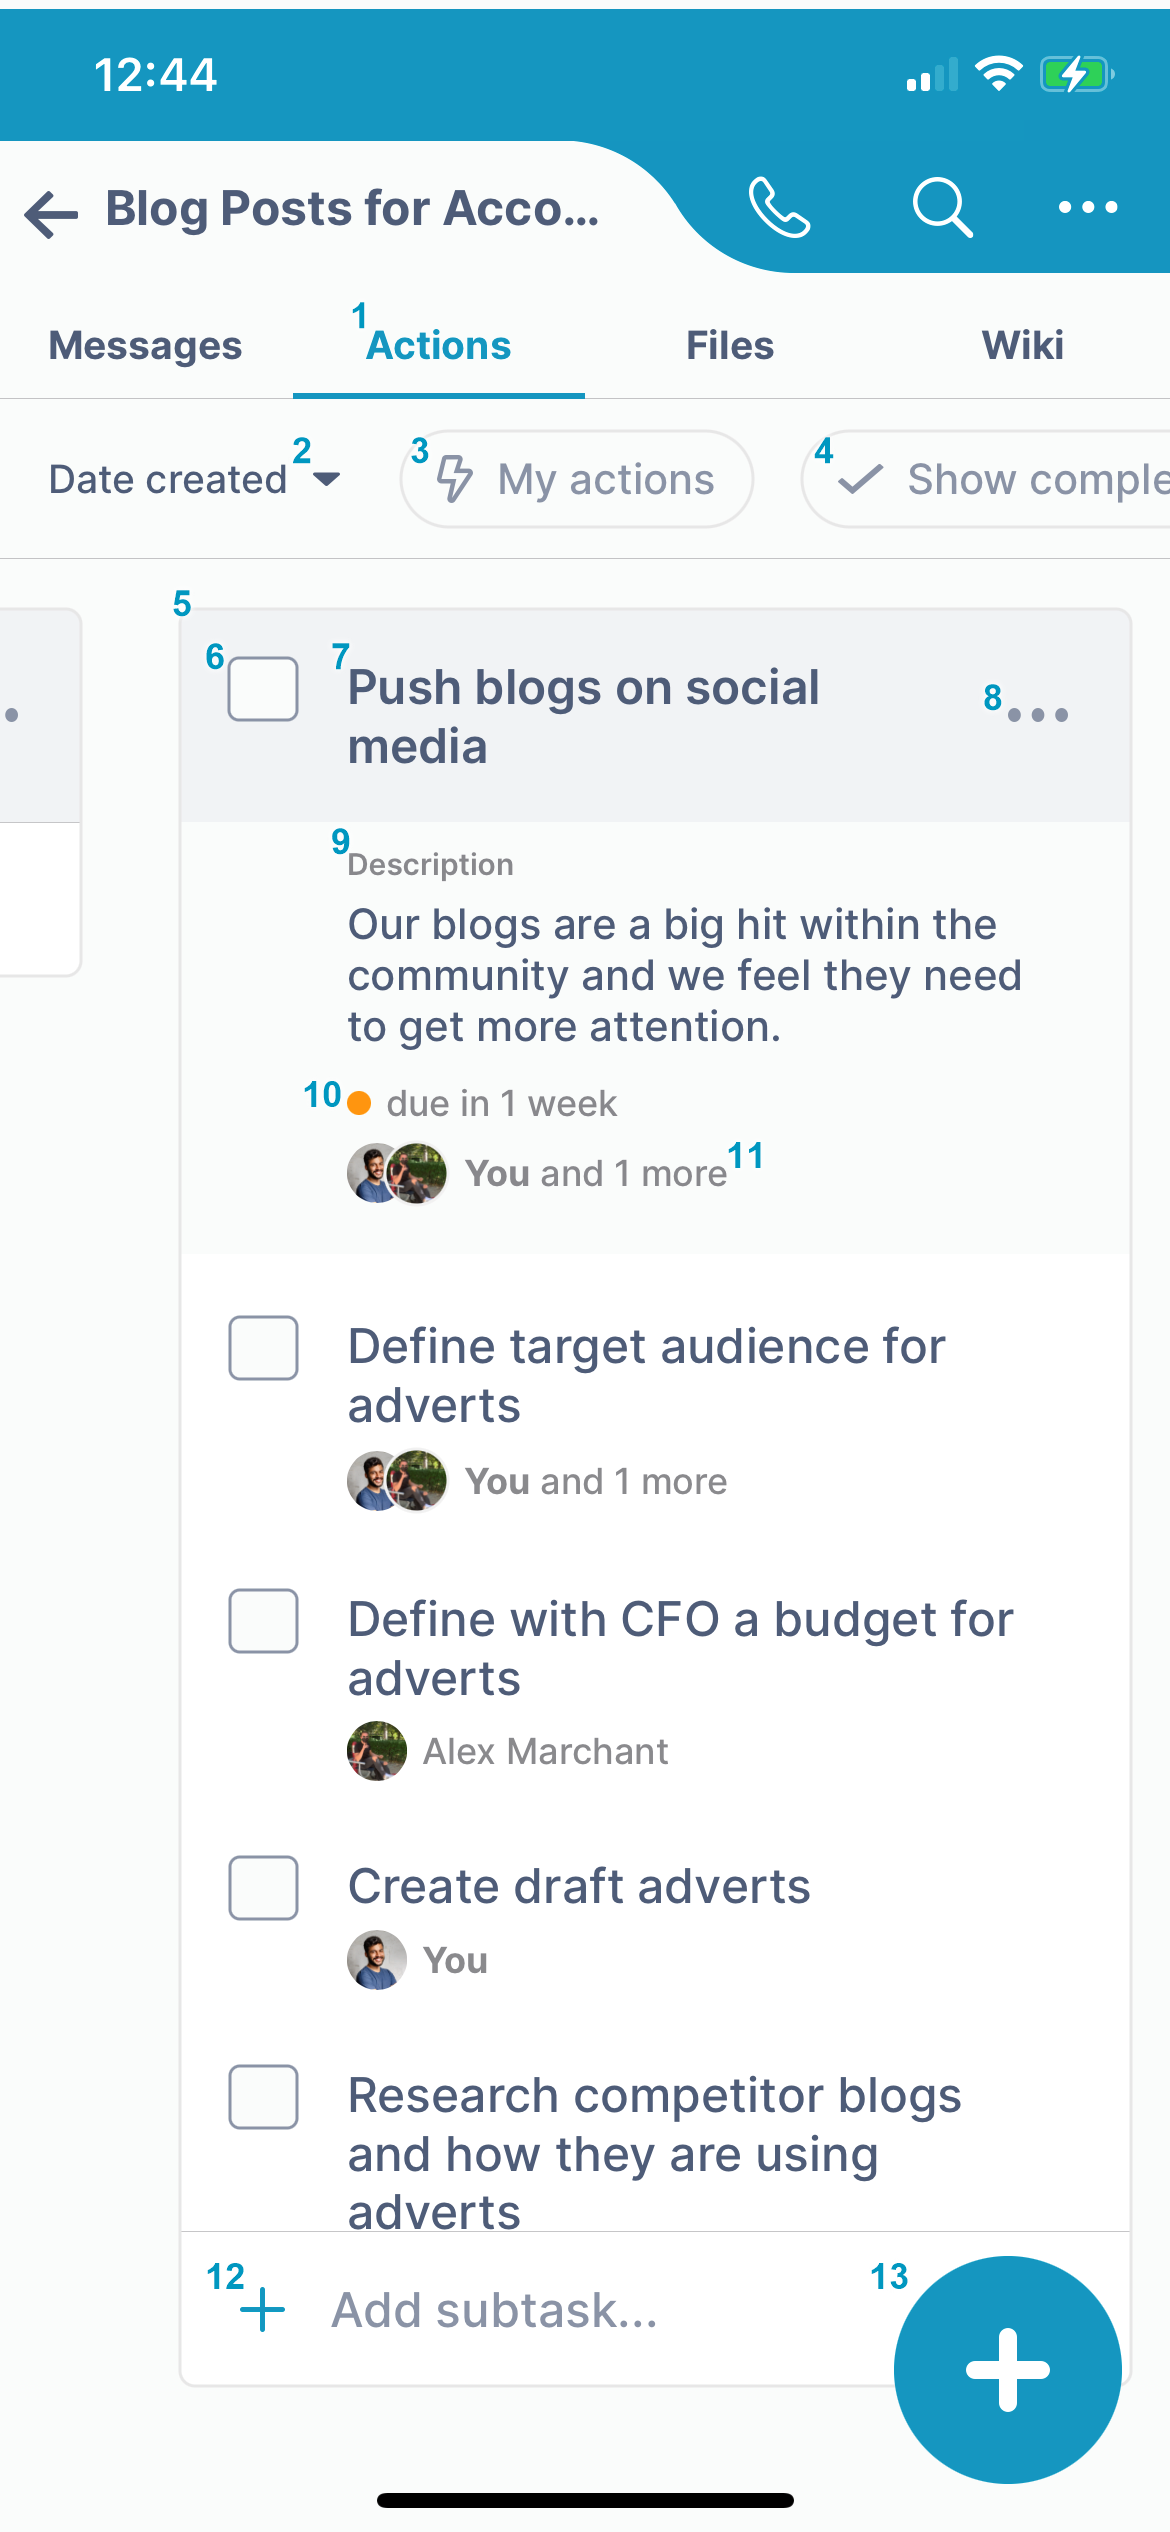
View a channel's actions in the iOS app
| - Back button - Click to go back to the dashboard.
- Tap to start a meeting.
- Search in this channe
|